What is custom email integration used for?
Custom email integration lets your organization send all notifications and workflow emails from your own SMTP mail server instead of the default Signit service. This gives you full control over deliverability, sender identity, and branding — improving trust with recipients.
Step 1: Navigate to integrations
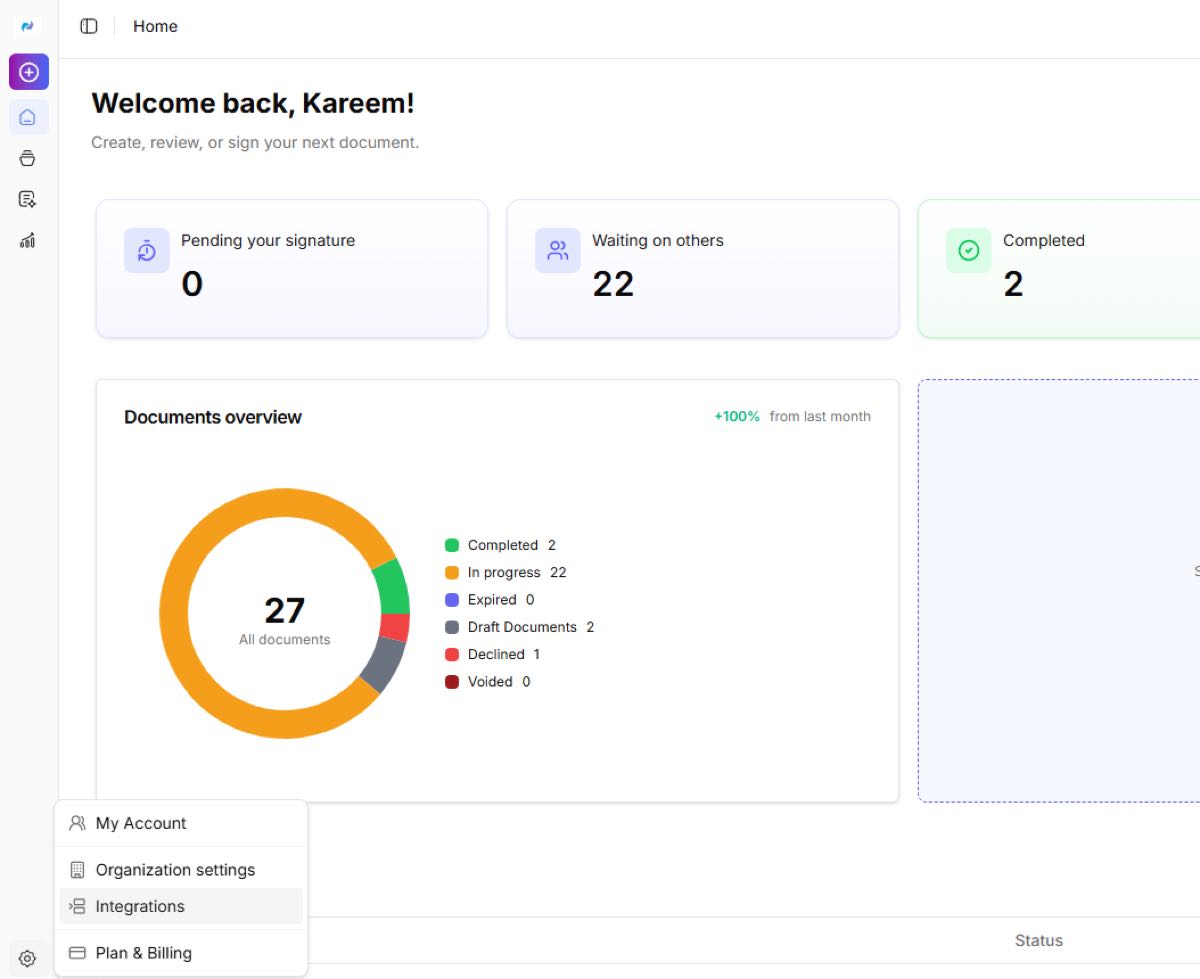
Step 1 of 6From the Signit homepage, open the side menu and select Integrations.
Step 2: Select custom email provider
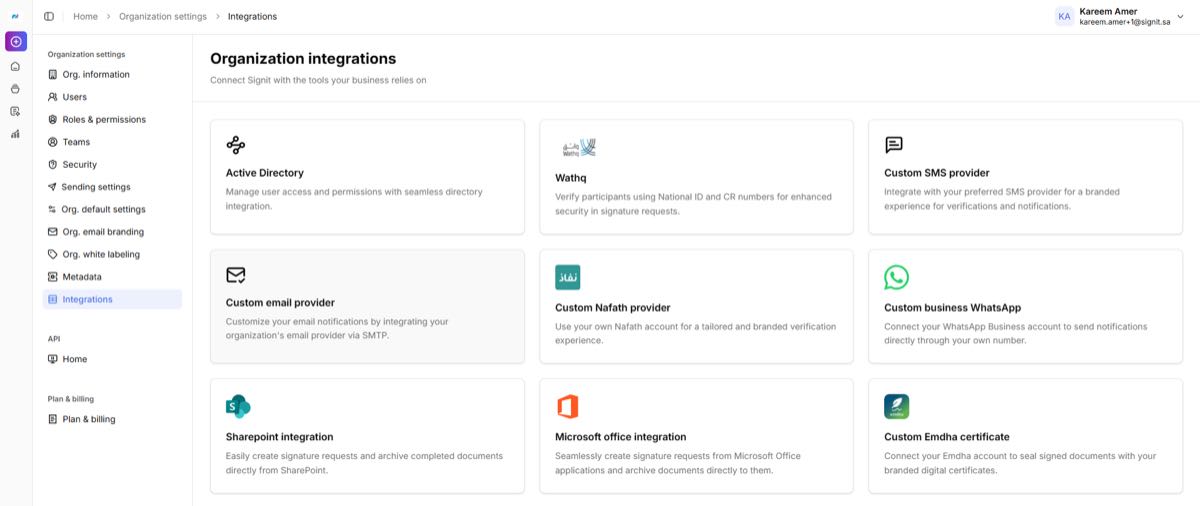
Step 2 of 6Find and select the Custom email provider integration card to start the setup.
Step 3: Activate custom email integration
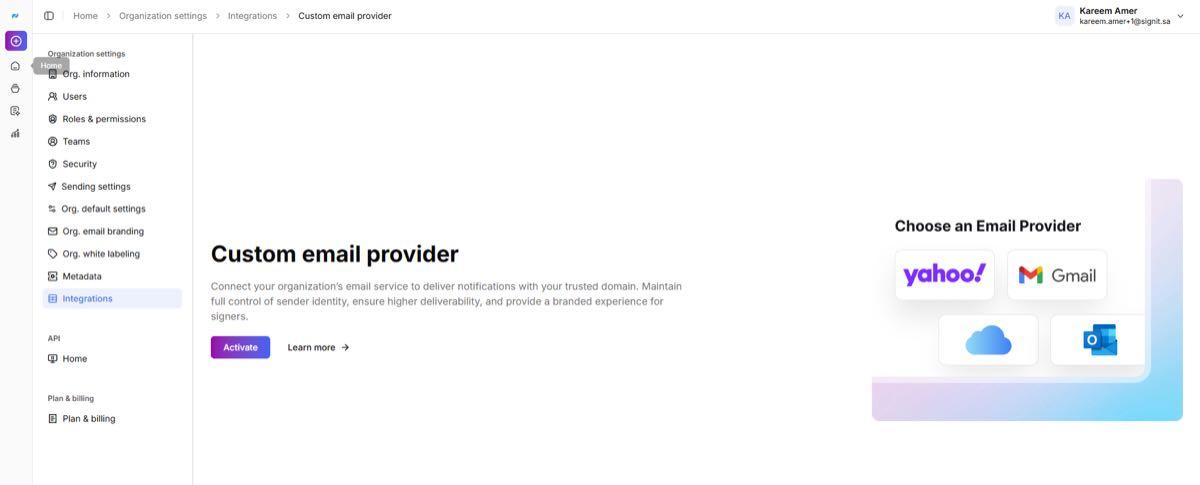
Step 3 of 6On the Custom email provider introduction page, click Activate to begin the SMTP configuration process.
Step 4: Enter SMTP basic information
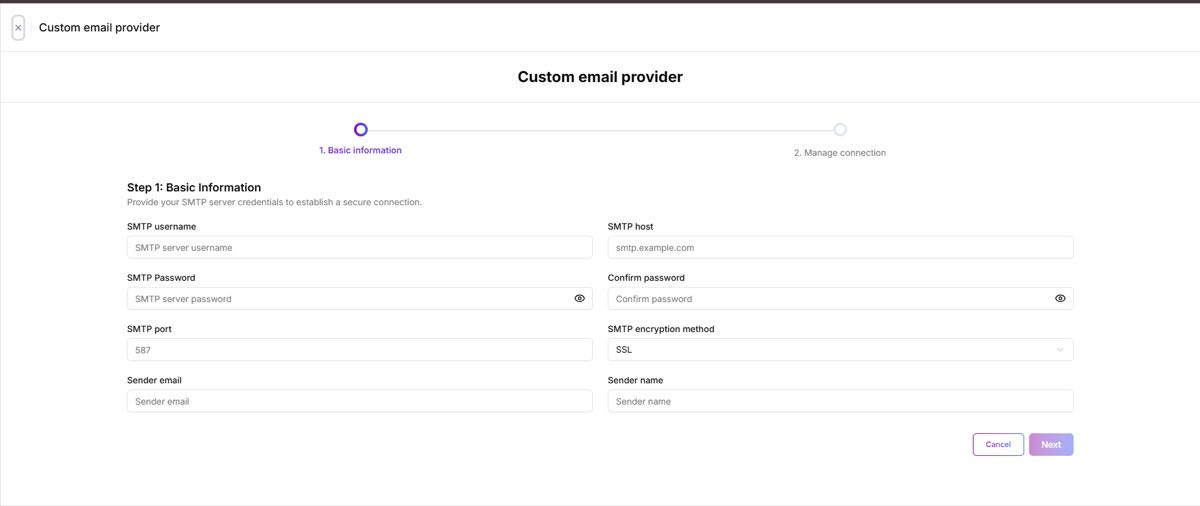
Step 4 of 6Fill out the required SMTP server credentials:
- SMTP username — the full email address or username authorized to send emails from your organization's server.
- SMTP password — the password for the above SMTP account.
- SMTP port — the port number your mail server uses for sending emails. Common values are
587(TLS),465(SSL), or25(non-secure). - Sender email — the email address that will appear as the sender in outgoing emails.
- SMTP host — the actual mail server's address, such as
smtp.example.comor your provider's SMTP endpoint. - Confirm password — re-enter your SMTP account password for confirmation.
- SMTP encryption method — select the encryption protocol (SSL, TLS, or none) that matches your mail server's security settings.
- Sender name — the name recipients will see (for example, your company name or “HR Department”).
Step 5: Manage and test connection
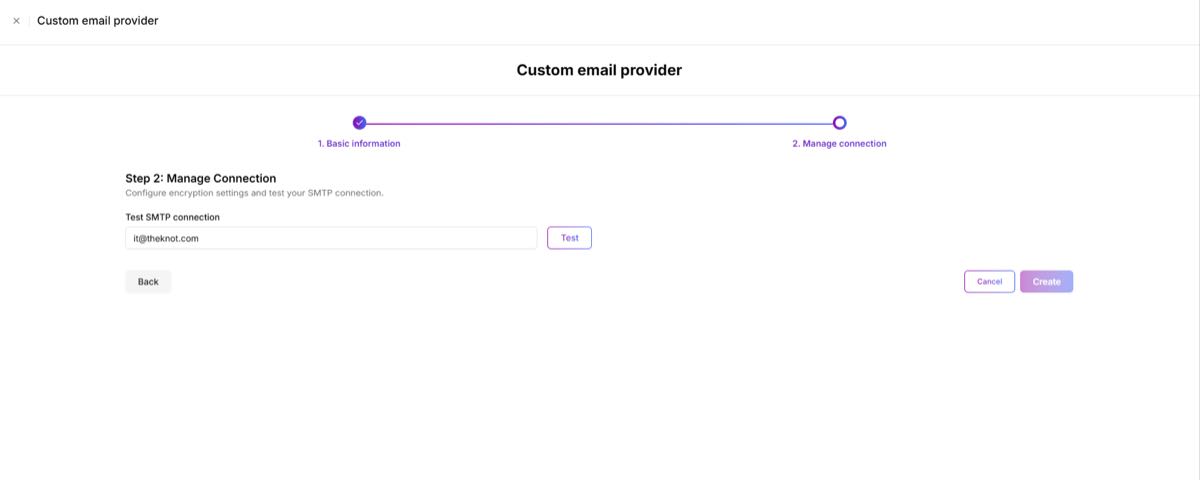
Step 5 of 6In the next step, enter a test recipient email and click Test to verify connectivity and email delivery. Signit sends a test email to confirm everything works correctly.
Step 6: Finalize and apply
Step 6 of 6Once the test is successful and you receive the confirmation email, click Create to save and apply your custom email provider settings. Your organization's emails sent by Signit will now be delivered through your own SMTP server.
Important notes
The SMTP credentials you enter must belong to an account authorized to send emails from your organization's domain. Invalid or limited-permission accounts may result in delivery failures.
Ensure your SMTP server supports encrypted connections (SSL/TLS) for enhanced security. Using unsecured connections may expose sensitive information in transit. Signit does not support port 25, which is unencrypted.
Whitelist Signit's outbound IP addresses on your SMTP server if strict firewall rules block external traffic.
Need help?
If you encounter any issues during setup, contact the Signit support team.
Signit support team
Reach out for setup assistance — or contact your dedicated account manager for urgent issues.
Was this article helpful?