What is custom SMS integration used for?
Custom SMS integration lets your organization connect its own third-party SMS gateway to Signit. This enables branded OTP verification and notifications through your trusted provider.
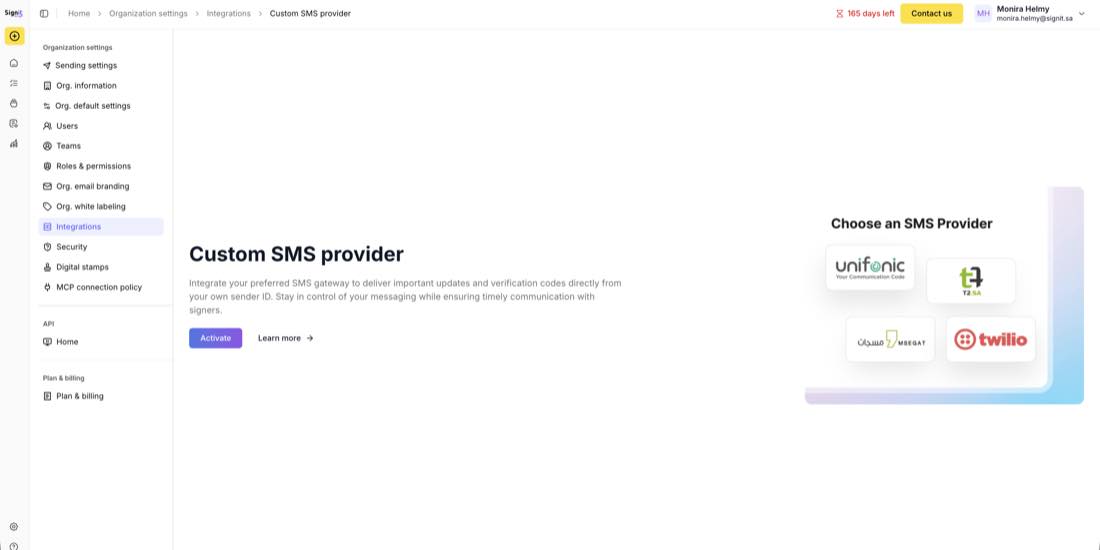
Step 1: Access and activate
Step 1 of 4Go to Organization settings → Integrations, select Custom SMS provider, and click Activate.
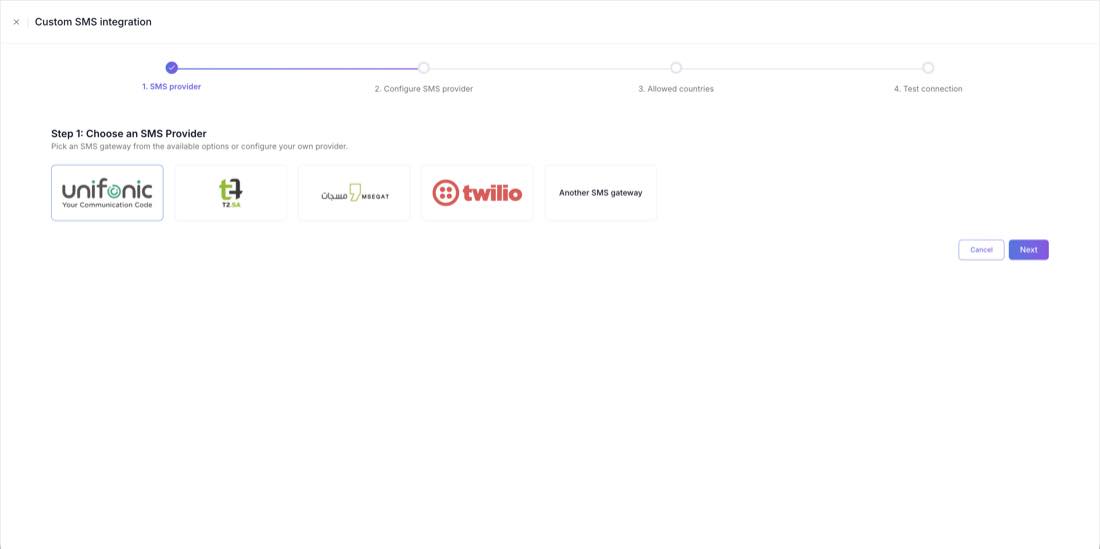
Step 2: Choose your provider
Step 2 of 4Select your SMS gateway from the list. The required fields change based on your selection.
Step 3: Configure provider details
Step 3 of 4Enter the credentials for your chosen provider. Pick your gateway below to see the exact fields it needs.
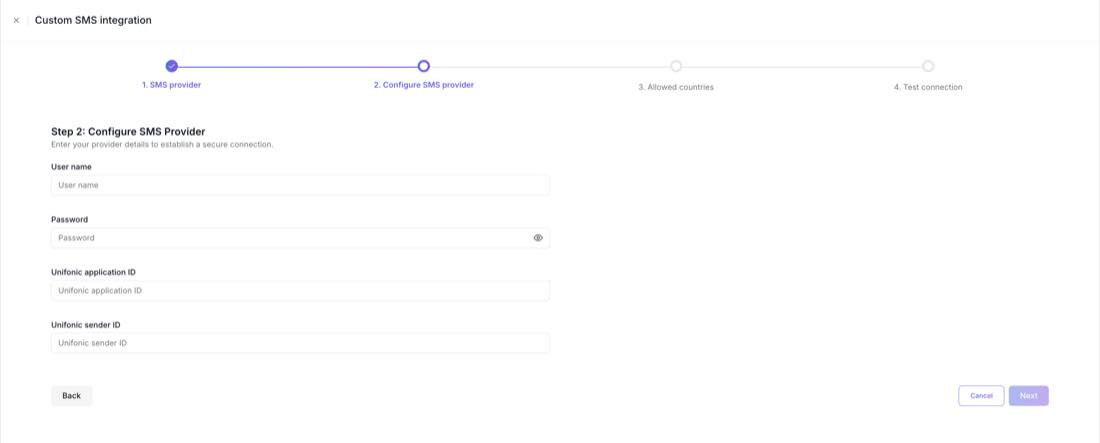
Option A: Unifonic
- Unifonic App ID — the unique application ID provided by Unifonic.
- Unifonic Sender ID — the approved sender name (for example, “Signit”) registered in your Unifonic account.
- Username — account username.
- Password — account password.
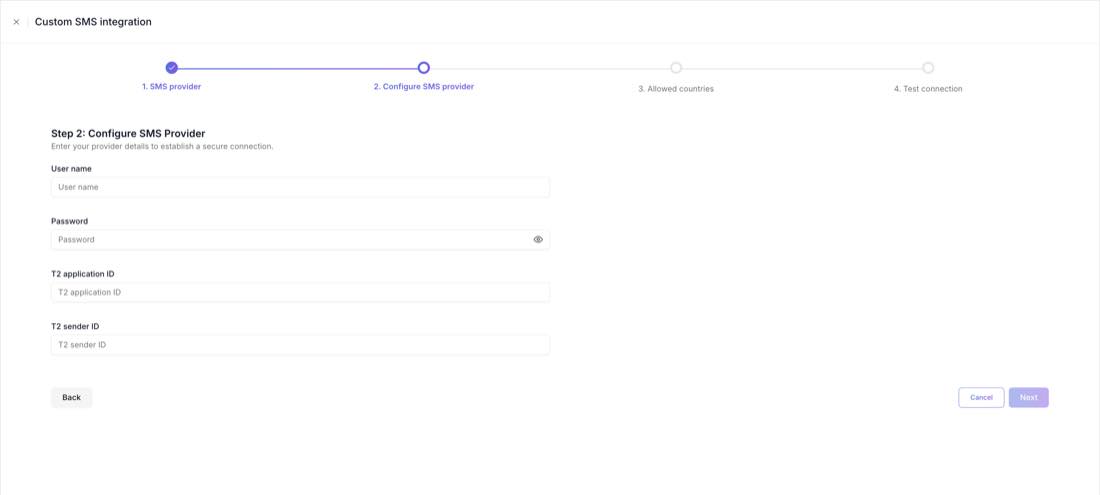
Option B: T2
- Application ID — your T2 application ID.
- Sender ID — the alphanumeric sender identity approved by T2.
- Username — your T2 account username.
- Password — your T2 account password or API secret.
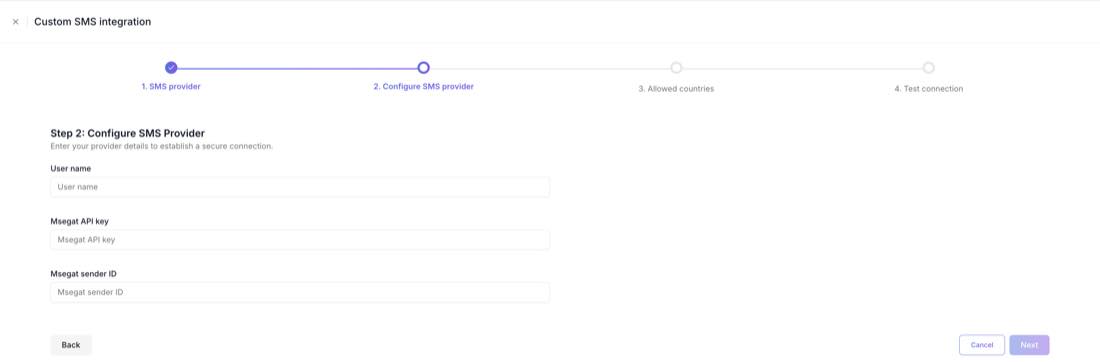
Option C: Msegat
- User name — your Msegat account username.
- API key — the API key generated from your Msegat dashboard.
- Sender ID — the registered sender ID for your messages.
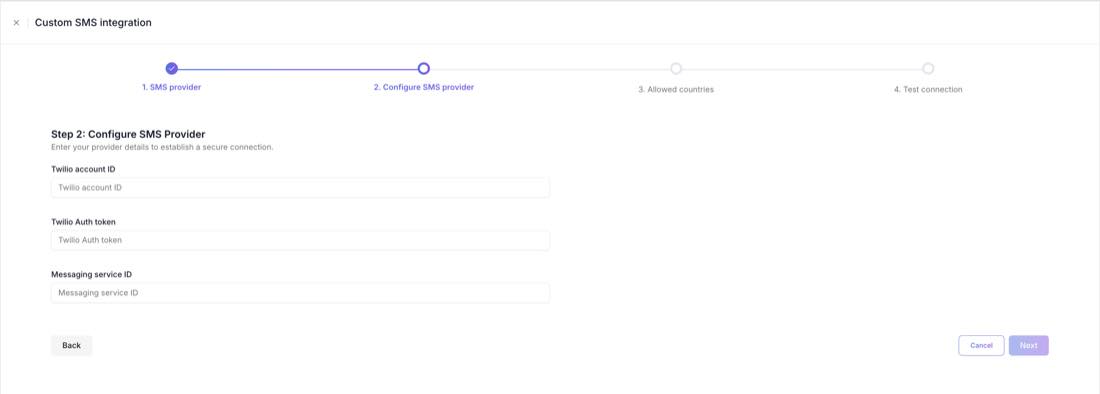
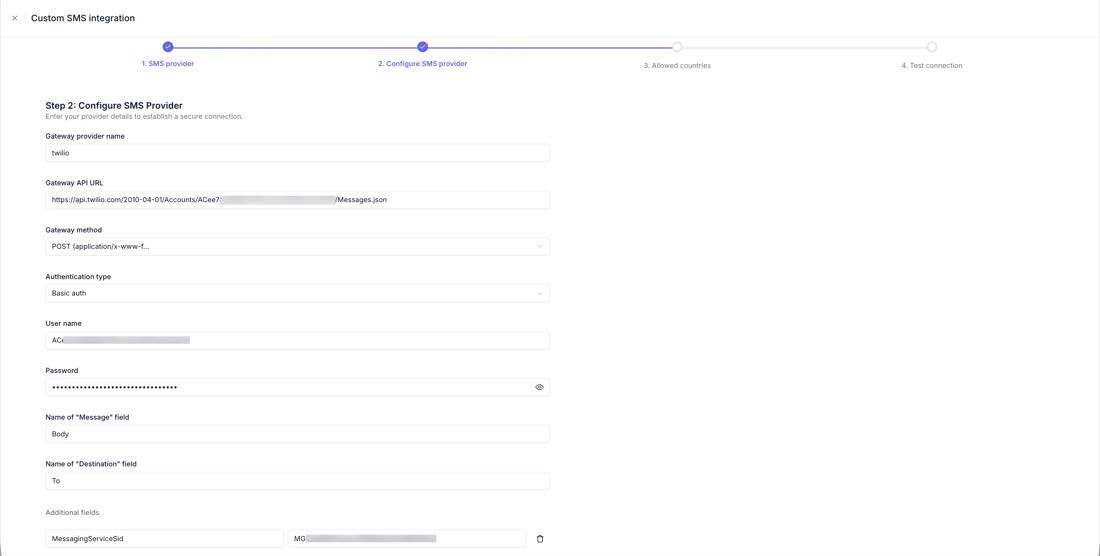
Option D: Twilio
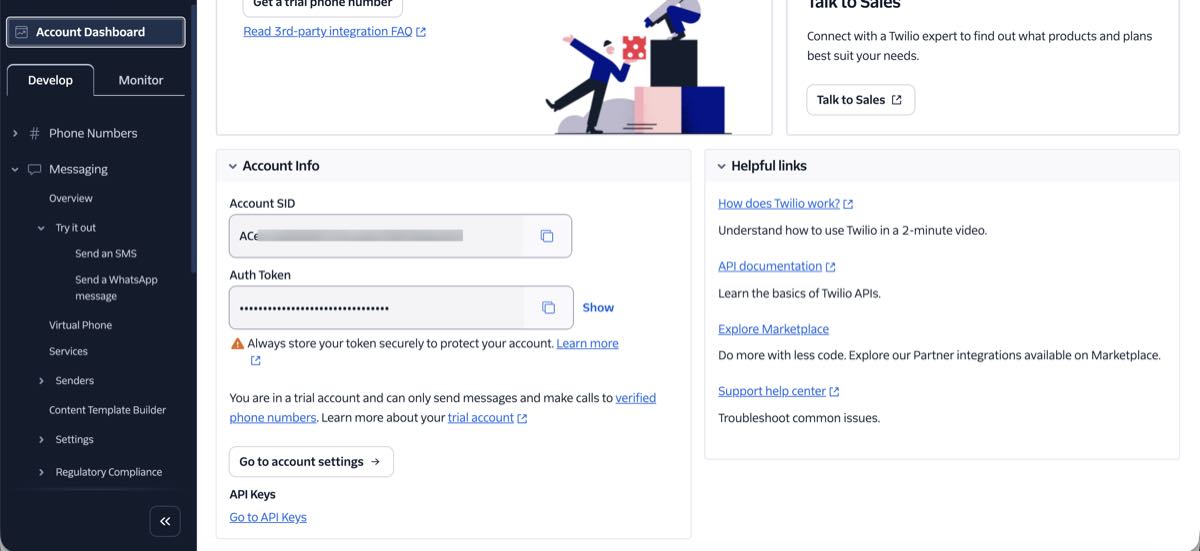
- Account ID — your primary Twilio account identifier.
- Auth token — the secret token used to authenticate API requests.
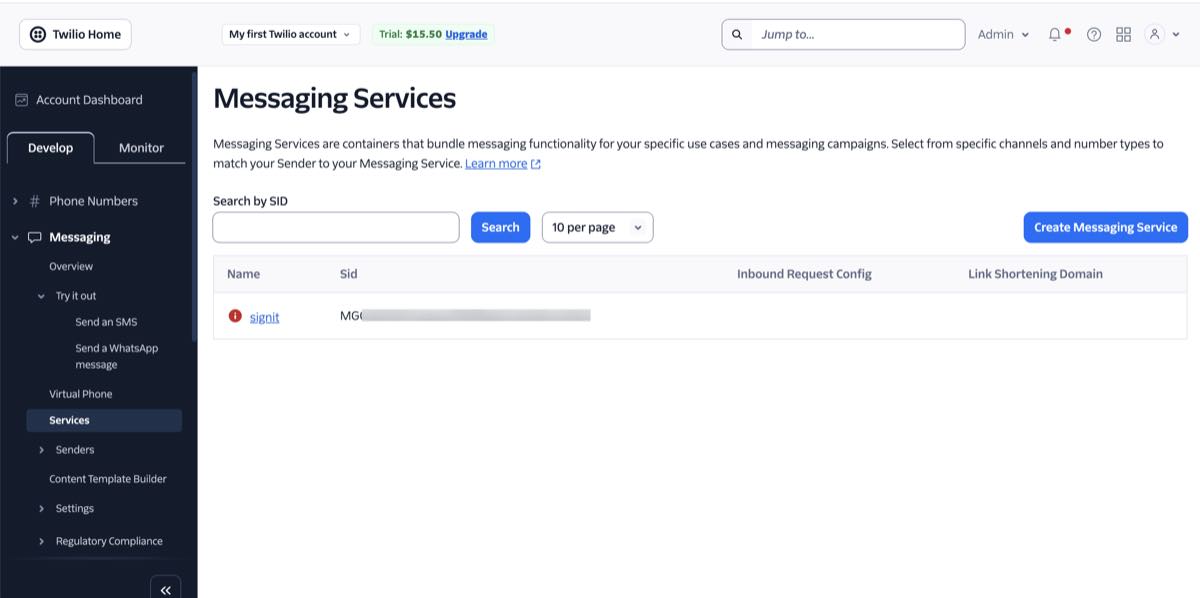
- Messaging Service SID — the ID of the specific messaging service configured in Twilio for this purpose.
You can find these values in the Twilio Console:
Option E: Other / custom gateway
For providers not listed, use the generic configuration:
- Gateway provider name — the name of your provider.
- Gateway API URL — the endpoint URL for sending SMS (for example,
https://api.provider.com/send). - Gateway method — select GET or POST depending on the API requirements.
- Authentication — choose “No auth,” “Basic auth,” “Bearer token,” or “API key,” then enter the credentials.
- Field mapping — map the API parameters manually:
- “Message” field — the parameter name the API expects for the message body (for example,
msgortext). - “Destination” field — the parameter name for the recipient number (for example,
toormobile). - Additional fields — add any extra required static parameters (such as
sender_idorformat).
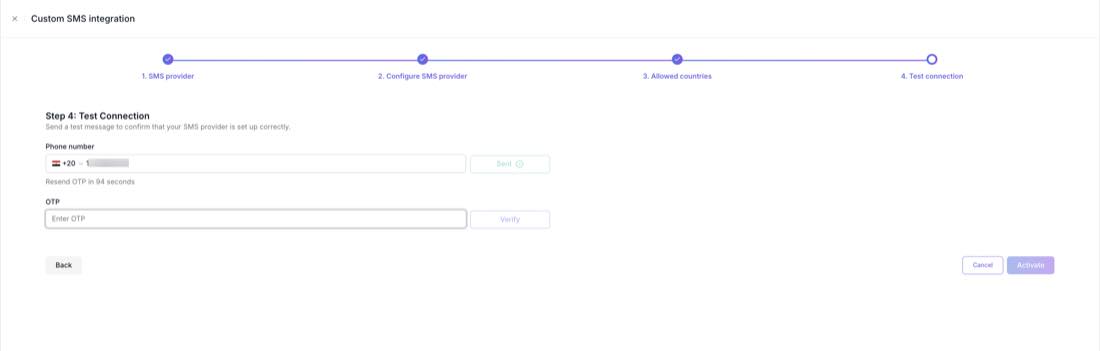
Step 4: Set allowed countries and test
Step 4 of 4- Select the countries you want to allow SMS traffic to.
- Enter a mobile number and click Send OTP to verify the integration works.
- If the OTP is received, enter it to complete the setup.
- Once done, click Activate.
Need help?
If you encounter any issues during setup, contact the Signit support team.
Signit support team
Reach out for setup assistance — or contact your dedicated account manager for urgent issues.
Was this article helpful?