The four options
SSO lets your team members sign into Signit using their existing organizational credentials. Pick the option that matches your identity setup — the first two need no configuration; the last two connect to your identity provider.
- Google — one-click, no configuration. Best for Google Workspace organizations.
- Microsoft — one-click, no configuration. Best for Microsoft 365 organizations.
- Microsoft Entra ID (OIDC) — an app registration in your tenant; full control over who can access Signit.
- SAML 2.0 — connect any SAML identity provider. The most flexible, and the most involved.
1. Open the SSO wizard
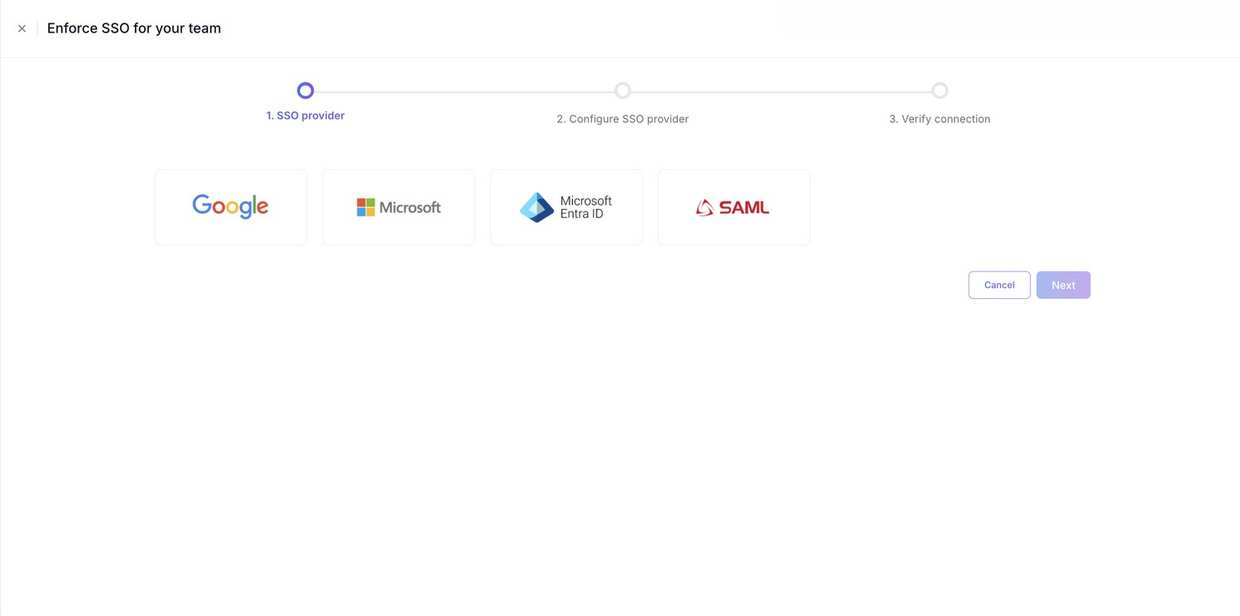
Organization settings → SecuritySign in as an admin, go to Organization settings → Security, and click Enforce SSO. On step 1 you'll see the four providers — Google, Microsoft, Microsoft Entra ID, and SAML. Pick one and continue.
2. Google or Microsoft (one-click)
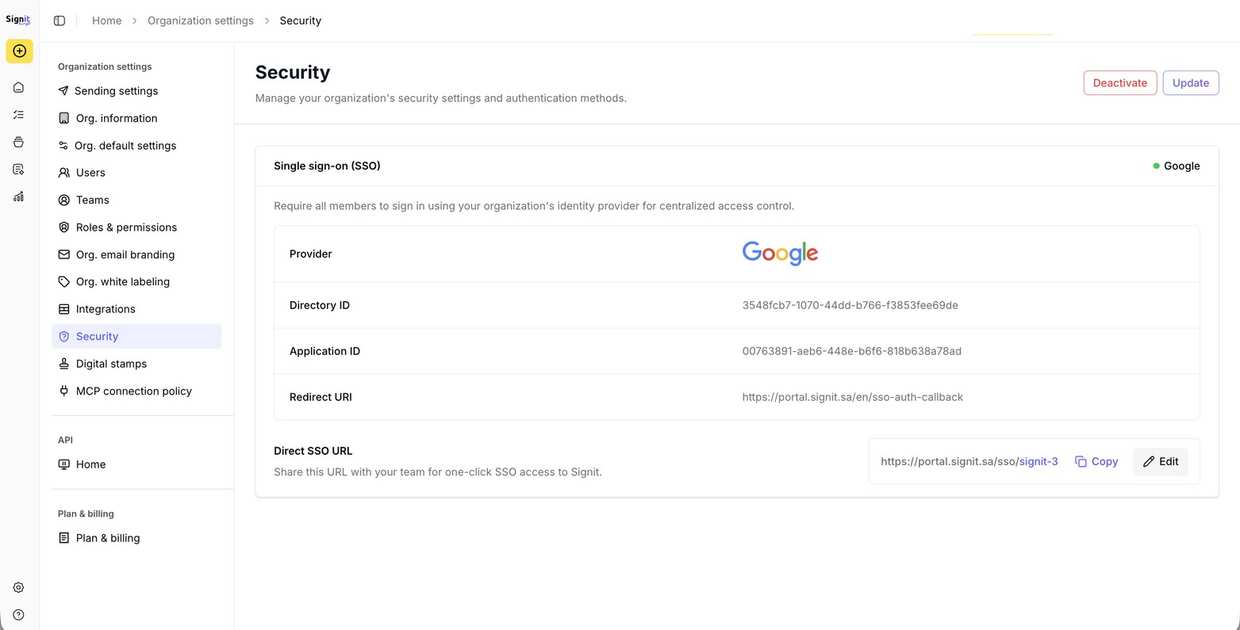
No configurationThe simplest options need nothing more than a click. Select Google (or Microsoft) and click Activate. SSO is immediately active, and everyone in your organization signs in with those credentials.
- Once enforced, users can no longer sign in with email and password — only through the chosen provider. Make sure your admins have working accounts on it first.
3. Microsoft Entra ID (OIDC)
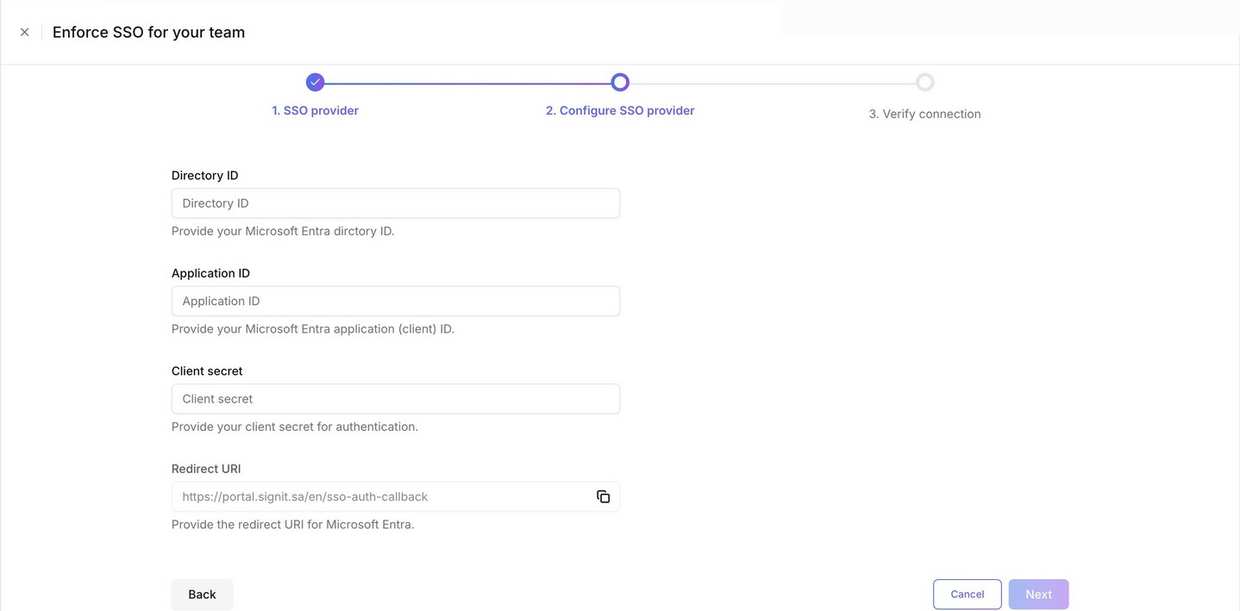
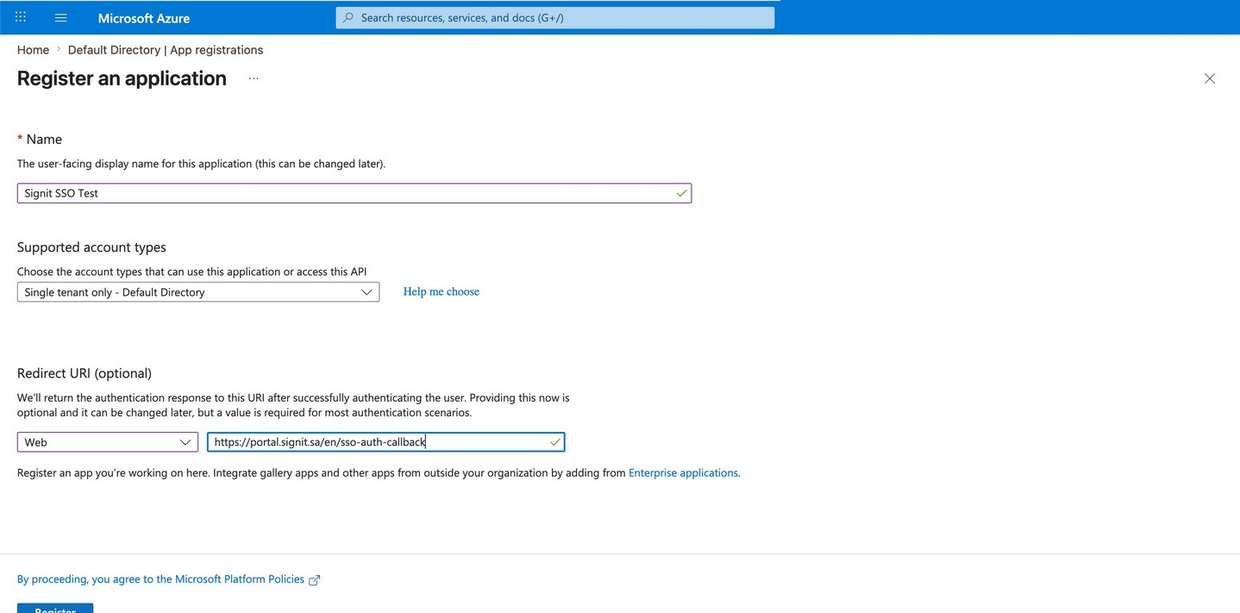
App registrationThis option uses OpenID Connect and gives you tenant-level control. In Signit, select Microsoft Entra ID, click Next, and keep the configuration form open. In portal.azure.com → Microsoft Entra ID → App registrations → New registration, create the app, then copy the values it needs — Tenant ID, Client ID, and a client secret — back into Signit and finish.
4. SAML 2.0
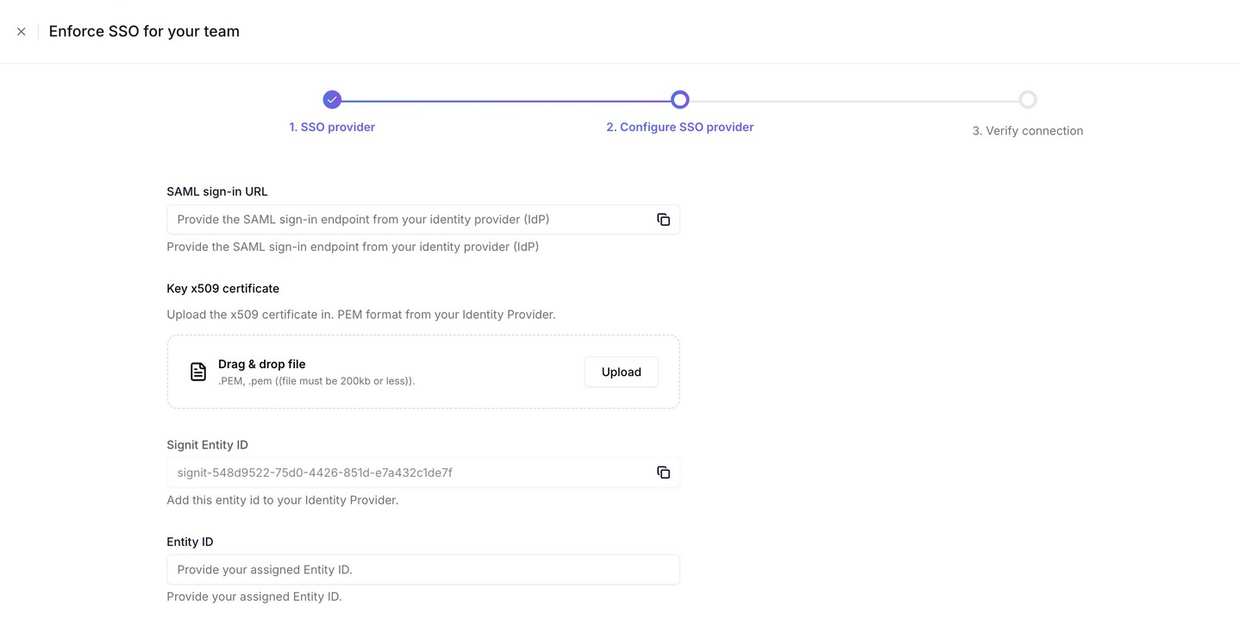
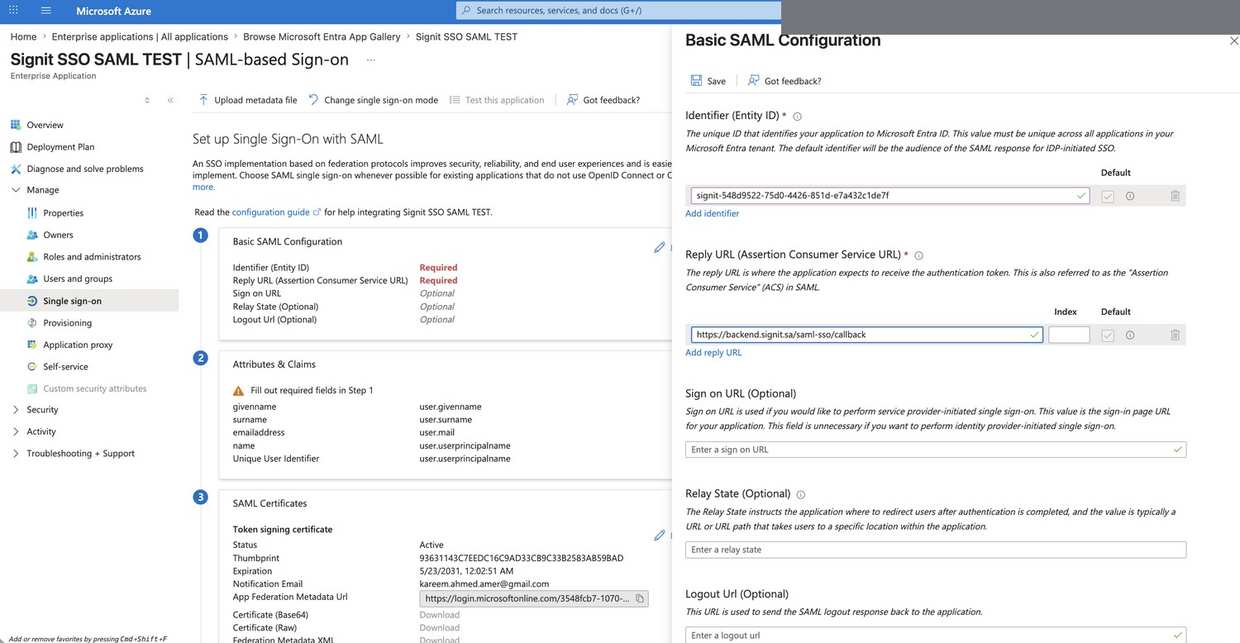
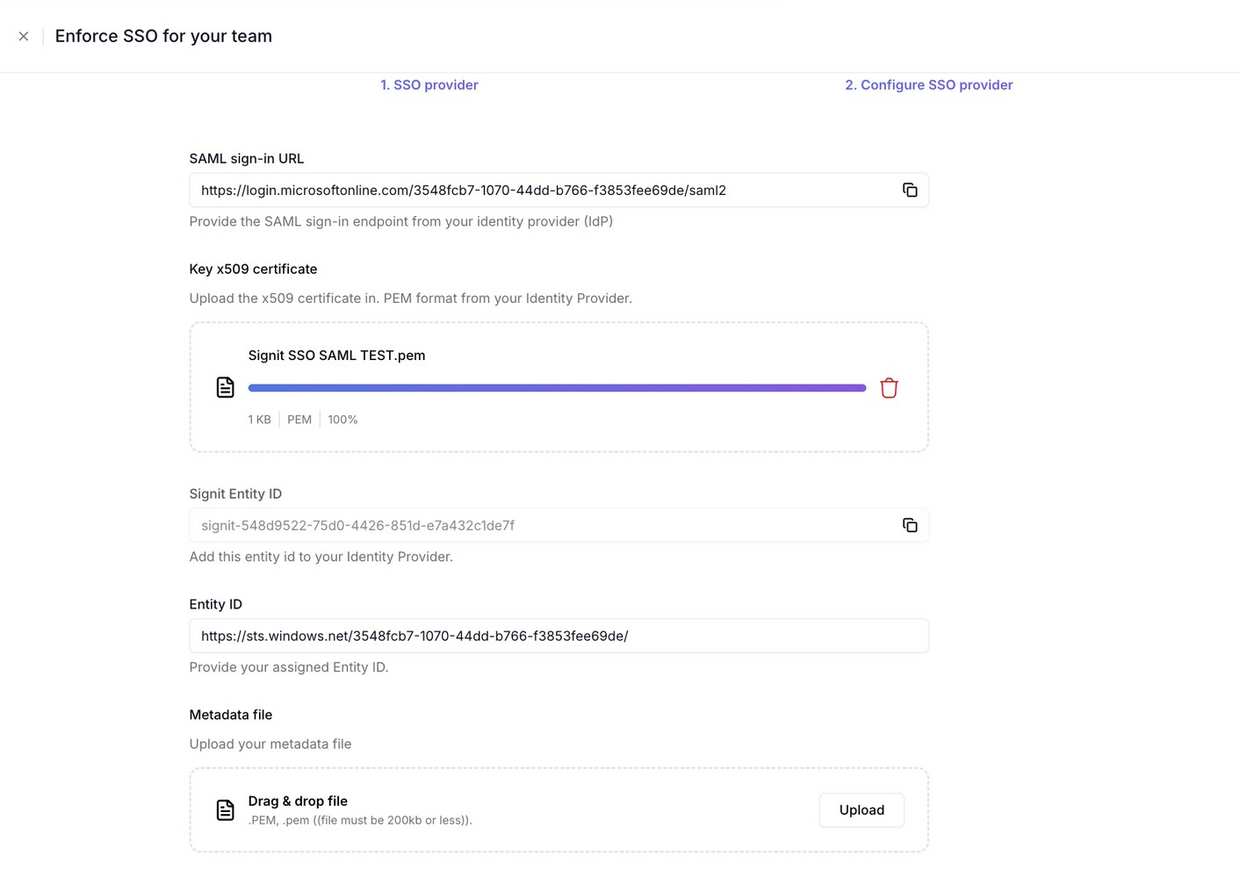
Any SAML identity providerFor a custom identity provider, choose SAML. Signit shows the values your IdP needs — the sign-in (ACS) URL, Entity ID, and the redirect URI — plus fields for your IdP's metadata URL and allowed domains. In your IdP (here, an Azure Enterprise Application), create the app, enter Signit's values into the Basic SAML configuration, download the signing certificate, and paste everything back into Signit.
- Copy the redirect URI from the form itself. The Arabic interface generates an
/ar/URL and the English one an/en/URL — a mismatch here is the most common cause of a failed connection.
5. Verify the connection
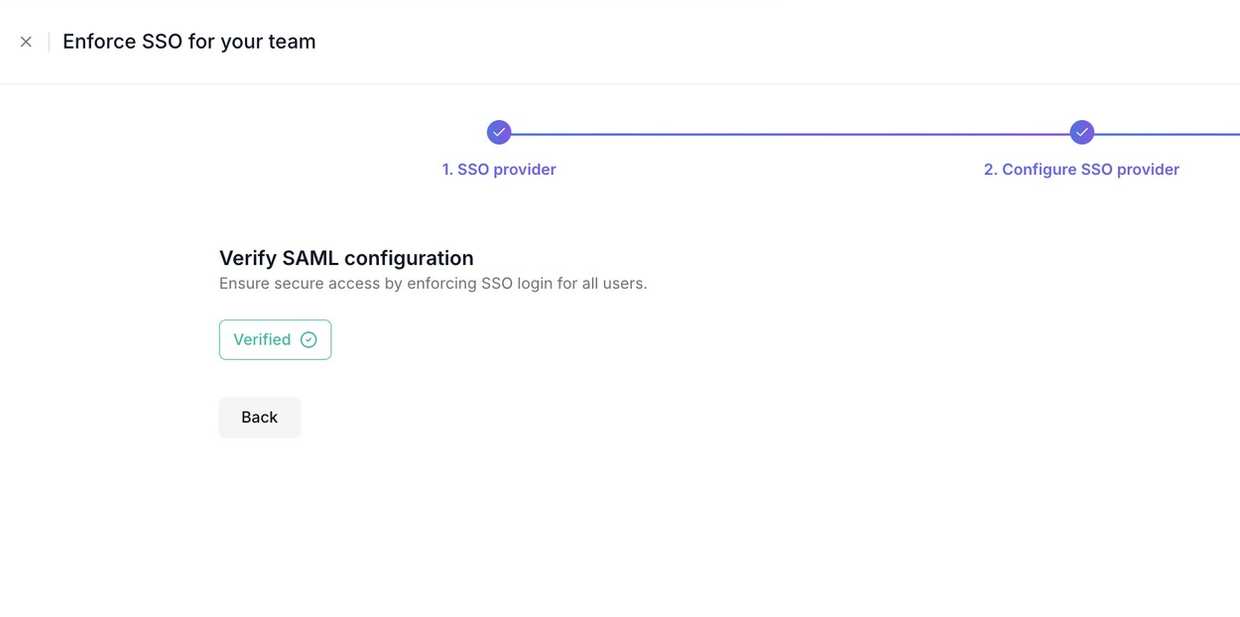
Final stepThe wizard's last step confirms everything lines up. Signit checks the SAML settings and, once verified, enforces SSO across all users. From then on, your team signs in through your identity provider.
Good to know
Enforcing SSO replaces email-and-password login. Confirm your admins can sign in with the chosen provider before you enforce it.
Google and Microsoft need no configuration; Entra ID and SAML require setup in your identity provider.
The redirect URI is language-specific (/ar/ vs /en/) — always copy it from the form to avoid a mismatch.
You need admin access to your Signit organization, and (for Entra ID/SAML) admin access to your identity provider.
Need help?
SSO setup can be fiddly — the Signit support team is happy to help.
Signit support team
Reach out for help — or contact your dedicated account manager for urgent issues.
Was this article helpful?