What it does
Active Directory integration synchronises your employee records into Signit. Once connected, every employee appears as a suggested participant when someone sends a document, so recipients are filled in with the correct name and email instead of being typed by hand. It removes the most common cause of a document going to the wrong person: a mistyped address.
This integration syncs contacts only — it does not provide single sign-on. To control how people log in to Signit, set up Single sign-on instead. You choose one of two ways to connect:
- Microsoft Entra ID — connects via the Microsoft Graph API. Best if you're already on Microsoft 365; no need to expose your directory to the internet.
- Custom Provider (LDAP) — connects directly to an on-premises or non-Microsoft directory. Your LDAP server must be reachable from the internet.
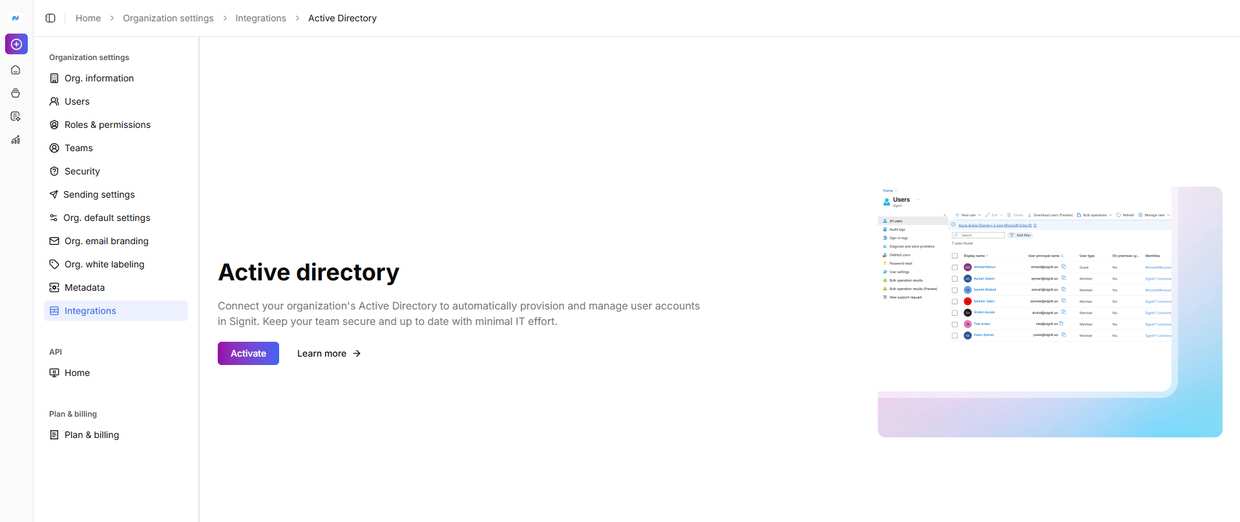
1. Choose your provider
Both optionsIn Signit, go to Organization settings → Integrations, open the Active Directory card, and click Activate. On step 1 of the wizard, pick Microsoft Entra ID or Custom Provider and click Next. The two paths differ completely from here, so decide before you start. Steps 2–5 below cover Entra ID; step 6 covers LDAP.
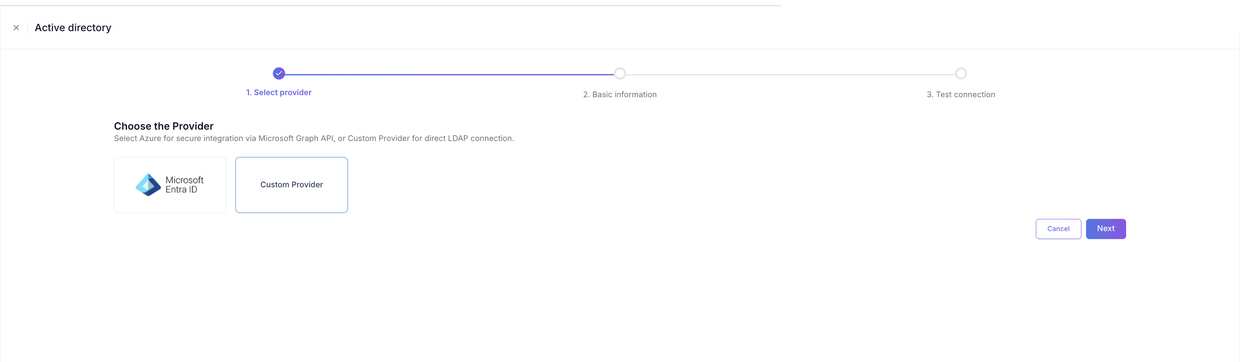
2. Entra ID — open the Signit form
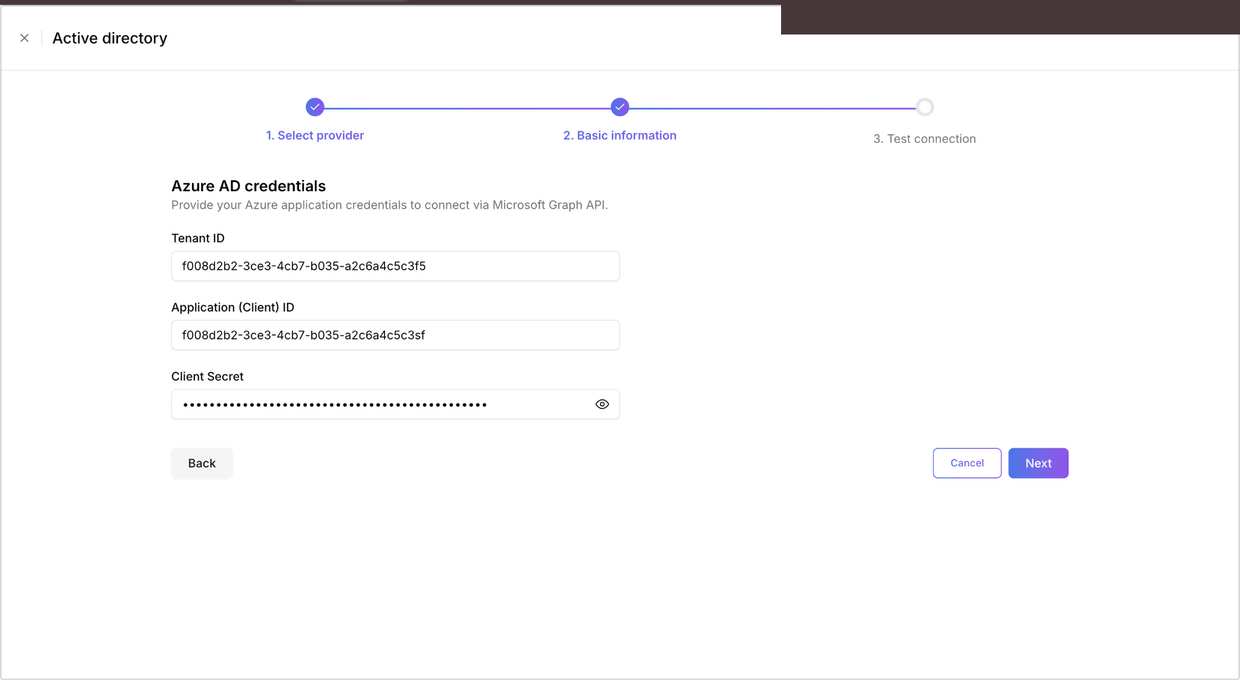
Microsoft Entra IDWith Entra ID selected, step 2 asks for three values: Tenant ID, Application (Client) ID, and Client Secret. Leave this screen open — you'll collect all three from Azure in the next steps. Keep both the Signit and Azure tabs open throughout.
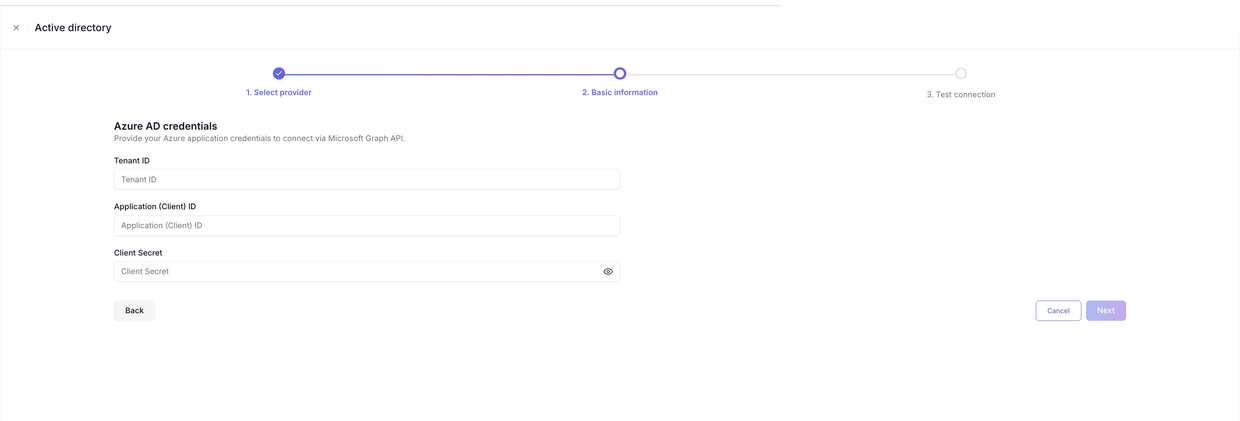
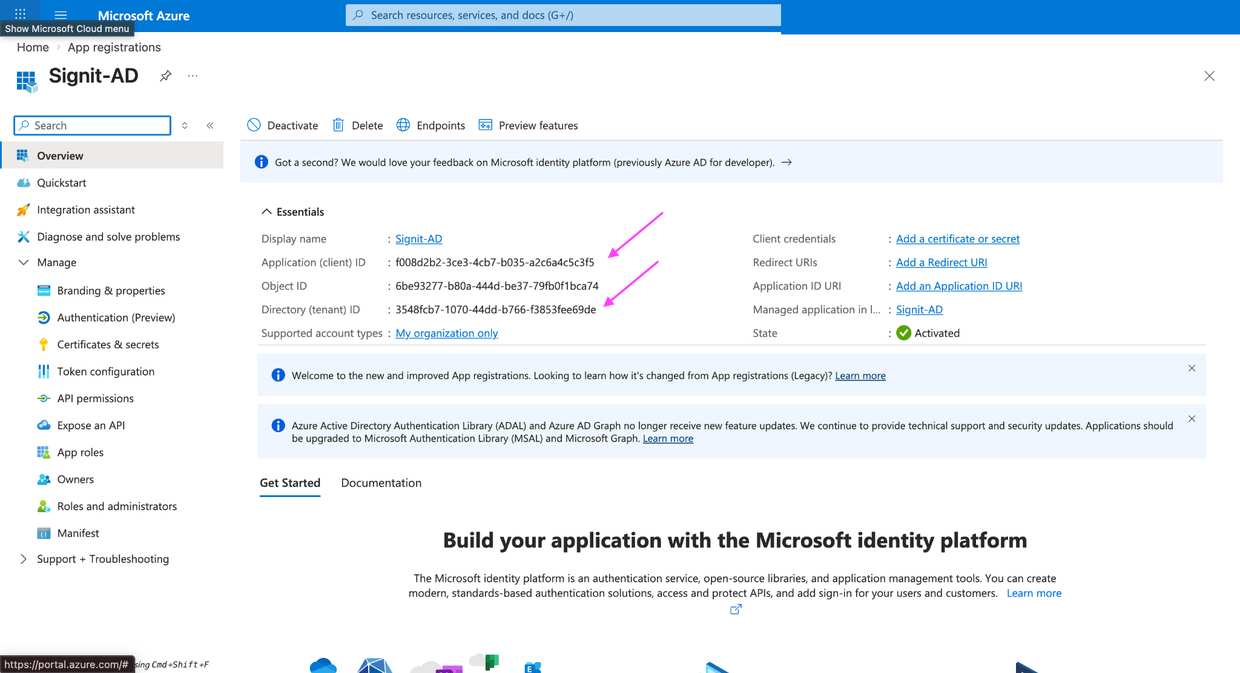
3. Azure — register the application
Azure portalIn portal.azure.com → Microsoft Entra ID → App registrations, click New registration. Name it (e.g. Signit-AD), leave Single tenant selected, and leave the Redirect URI empty — this app never signs a user in. Click Register. On the Overview page, copy the Application (client) ID and Directory (tenant) ID into the matching Signit fields.
4. Azure — create a client secret
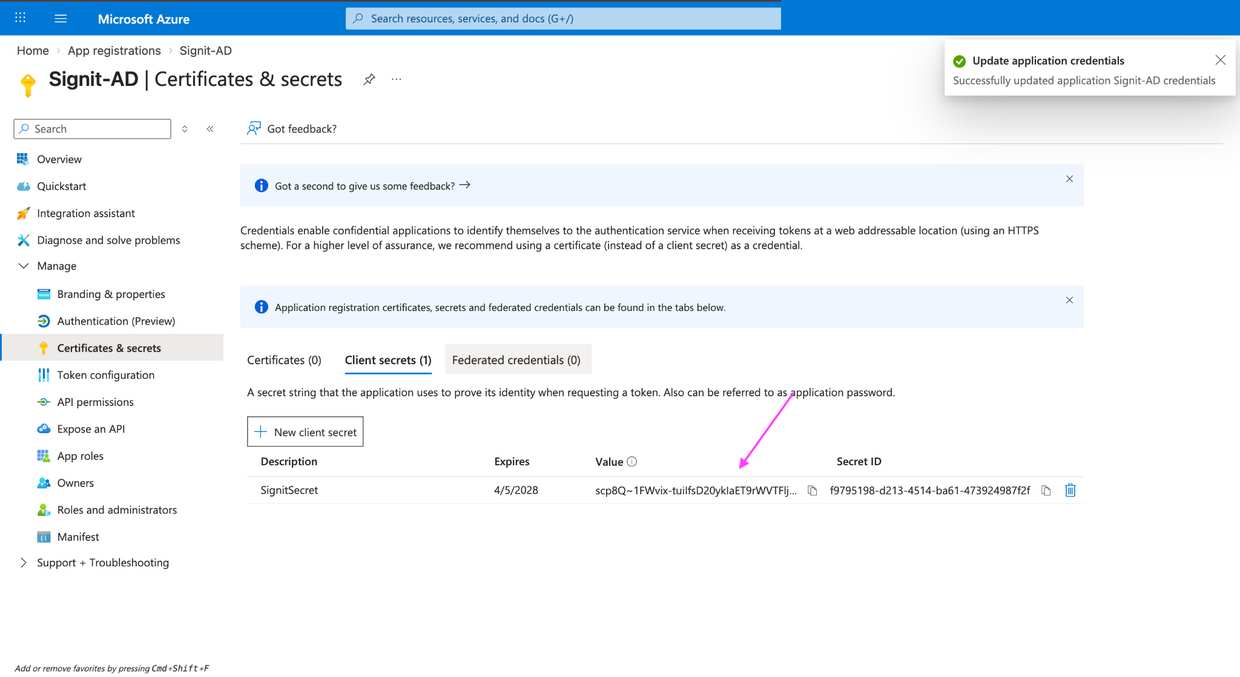
Azure portalUnder Manage → Certificates & secrets → Client secrets, click New client secret, add a description, set the expiry to 730 days (24 months), and click Add. Copy the Value immediately into Signit's Client Secret field. All three Signit fields should now be filled.
- Copy the Value, not the Secret ID. Azure shows the Value only once and hides it permanently as soon as you navigate away — if you lose it, delete the secret and create a new one.
5. Azure — permissions, consent, and test
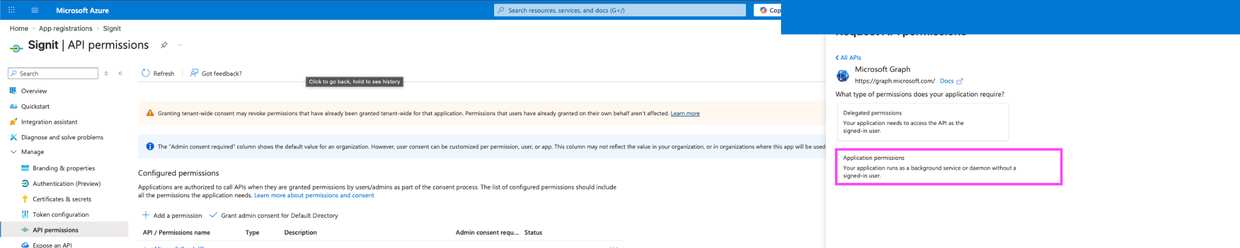
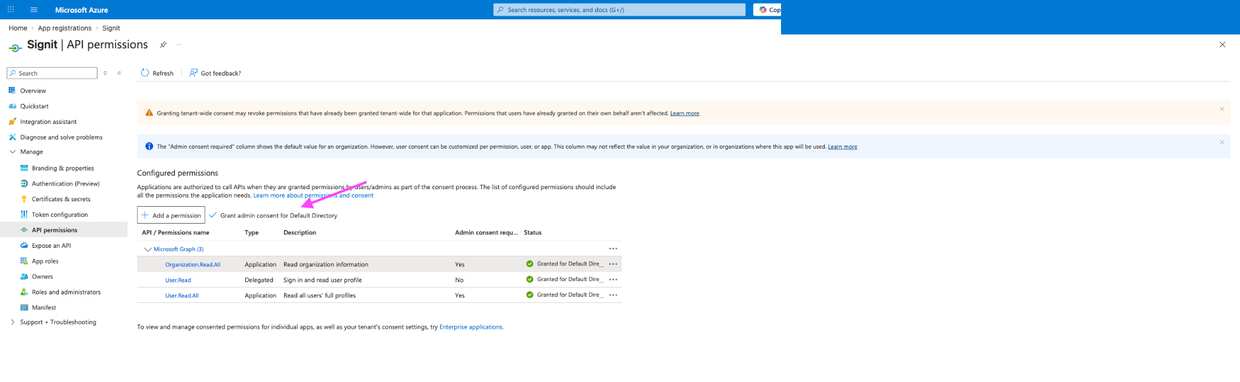
Azure portal → SignitThe app still can't read anything. Under API permissions → Add a permission → Microsoft Graph, choose Application permissions (not Delegated), and add Organization.Read.All and User.Read.All. Then click Grant admin consent and confirm both show a green tick.
- Delegated permissions act on behalf of a signed-in user. Signit syncs in the background with nobody signed in, so Delegated permissions always fail the test — this is the most common mistake.
- Back in Signit, click Next to reach step 3, then Test connection and save. On success the integration shows as enabled.
6. Custom Provider (LDAP)
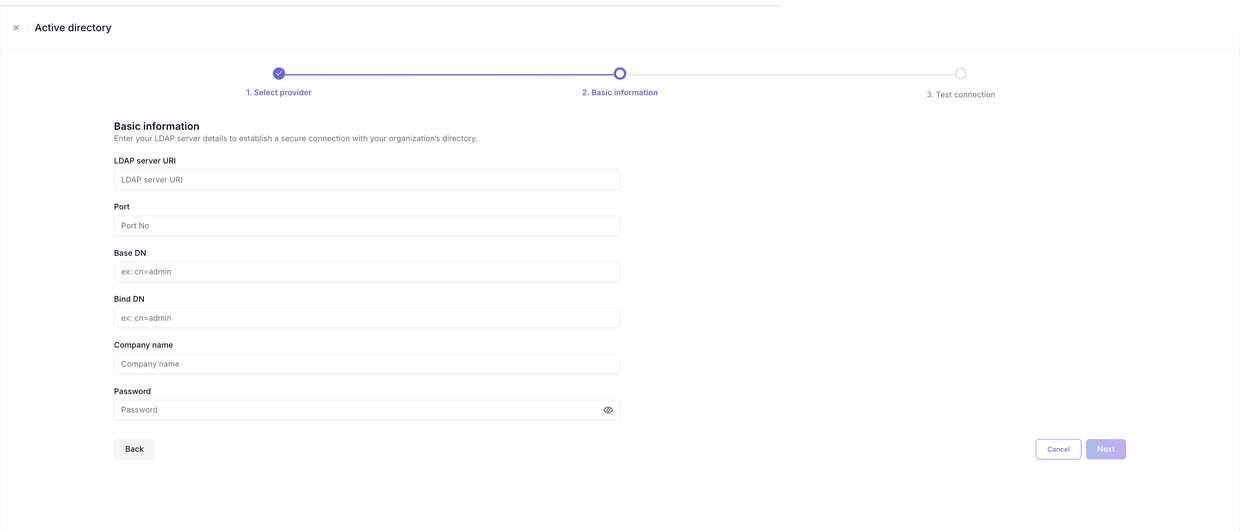
LDAP directoryThis option connects Signit directly to your directory server over LDAP — no Azure configuration — but Signit must be able to reach your LDAP server over the internet. On step 2, fill in the six fields, then click Next → Test connection and save:
- LDAP server URI —
ldap://orldaps://your server address. - Port — 389 for LDAP, 636 for LDAPS (confirm rather than assume).
- Base DN — where Signit starts searching, e.g.
dc=yourcompany,dc=com(ignore the wizard'scn=placeholder here). - Bind DN — the service account as a distinguished name, e.g.
cn=admin,dc=yourcompany,dc=com, with read/search rights. - Company name — a label for this connection. Password — the Bind DN password (stored encrypted).
Maintenance & troubleshooting
Entra ID: rotate the client secret before it expires — a secret set to 24 months will expire, and the sync stops when it does. Create the new secret first, update Signit, test, then delete the old one.
LDAP: keep the bind-account password valid. If it's rotated under your password policy, update it in Signit at the same time.
Permissions error on test → confirm both permissions are Application (not Delegated) and admin consent shows green ticks.
Connects but no users sync → for Entra ID confirm User.Read.All; for LDAP the Base DN is probably too narrow or points at the wrong branch.
Need help?
Stuck on the wizard or a connection test? The Signit support team can help.
Signit support team
Reach out for help — or contact your dedicated account manager for urgent issues.
Was this article helpful?