What is organization white labeling for?
Organization white labeling in Signit lets you fully customize the visual identity and domain experience for your users and signers. It enables you to set your company's logo, select brand colors, and define redirect URLs, so all customer-facing pages and notifications match your corporate identity. This increases trust among signers, strengthens brand presence, and delivers a seamless experience from start to finish.
This is essential for:
- Creating a seamless, professional experience across all signer and user interfaces.
- Building trust through a consistent, familiar visual identity at every step of the workflow.
- Demonstrating your organization's attention to detail and commitment to branding excellence.
- Improving recognition and credibility when communicating with clients, partners, and team members.
Step 1: Navigate to organization white labeling
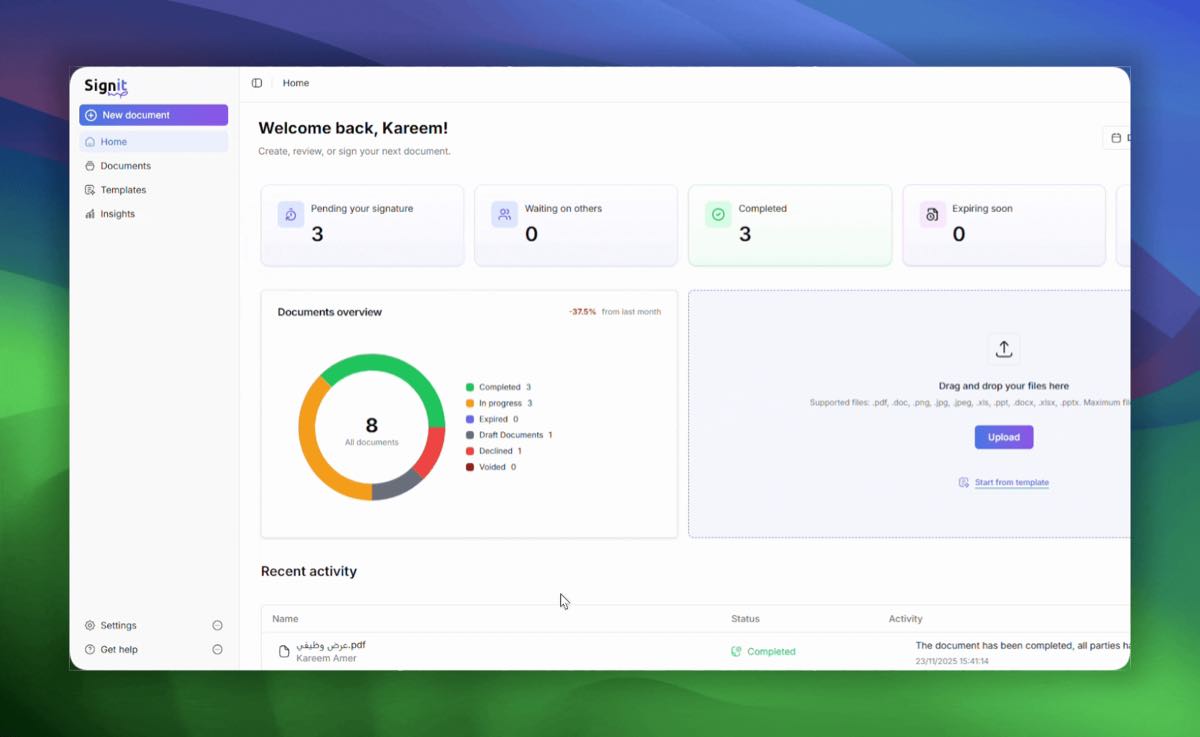
Step 1 of 4Begin from the Signit dashboard. Click your profile icon or the side menu, select Organization settings, and choose Org. white labeling.
Step 2: Activate white labeling
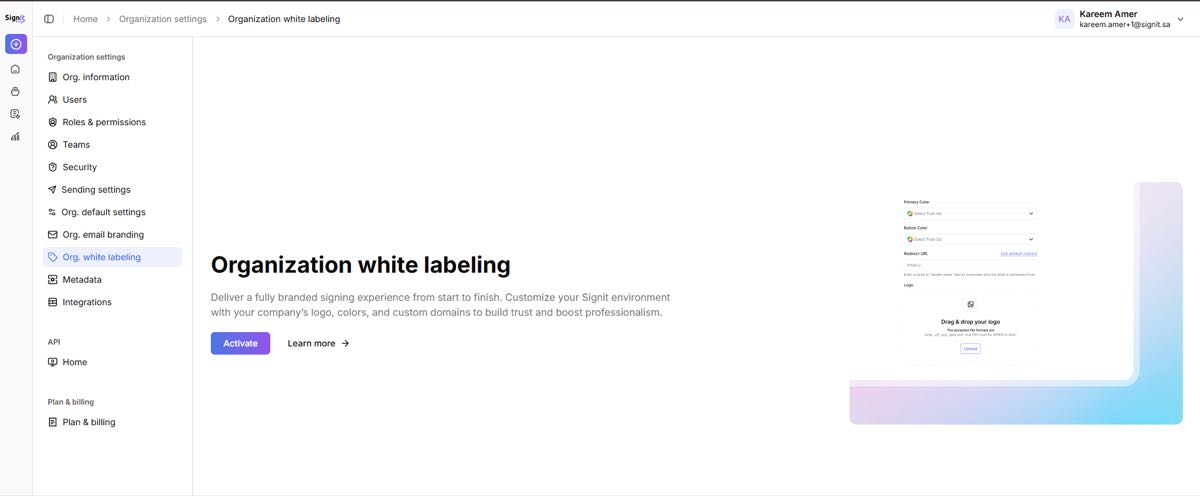
Step 2 of 4You'll see an introduction to white labeling. Click Activate to unlock the customization fields for your environment's white-label setup.
Step 3: Set brand colors, logo, and redirect URL
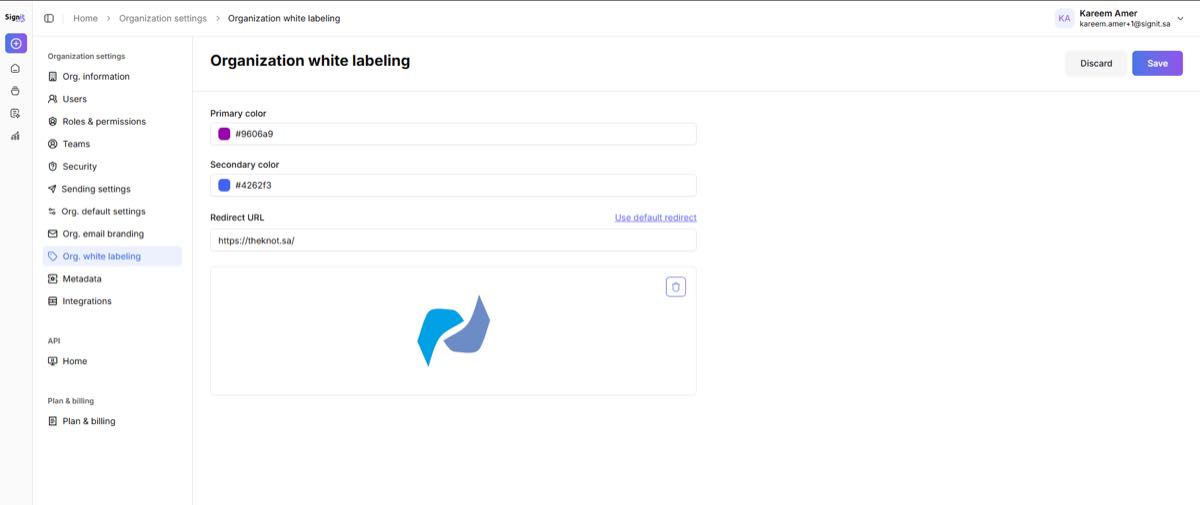
Step 3 of 4Configure your brand:
- Primary & secondary color — enter each using the color picker or a HEX code.
- Redirect URL — set the URL your users are redirected to.
- Logo — upload your company logo (drag and drop, or use the upload button).
Step 4: Preview and save changes
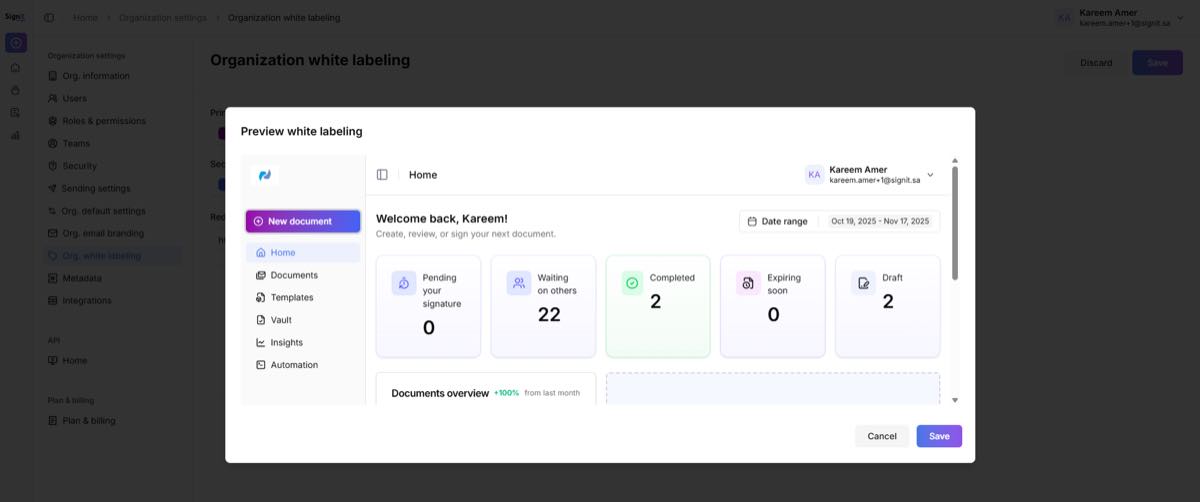
Step 4 of 4Click Save to preview how white labeling will appear to your users. When the branding looks correct, click Save again to apply the settings.
Need help?
If you encounter any issues during setup, contact the Signit support team.
Signit support team
Reach out for setup assistance — or contact your dedicated account manager for urgent issues.
Was this article helpful?