Before you start
This guide picks up where Create your first signature request leaves off. Once you've uploaded a document and reached the editor, these are the controls that turn a plain file into a precise, ready-to-send request — who's involved, in what order, and what each person must fill in.
You'll work in two places:
- The Add participants dialog — for roles and signing order.
- The Prepare to send panel and each field's properties — for placing and configuring fields.
Step 1: Give each participant a role
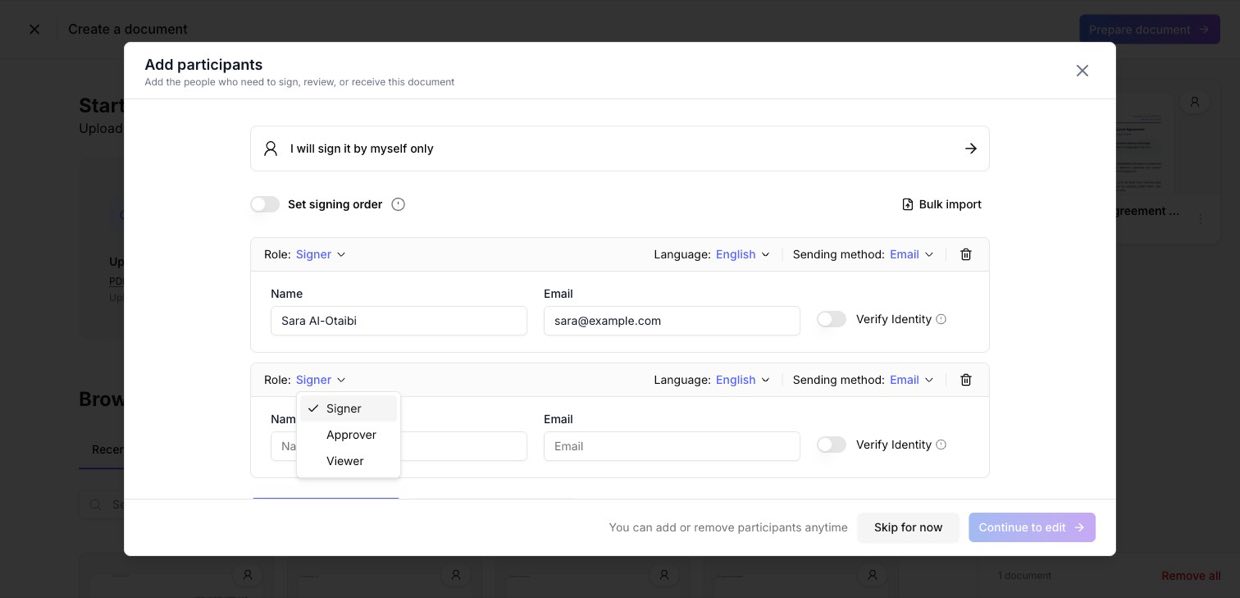
Step 1 of 4In the Add participants dialog, every person gets a Role. The role decides what they can do with the document:
- Signer — adds their signature and/or fills in fields. Use for the people actually executing the document.
- Approver — reviews and approves without signing. Their approval is logged in the audit trail. Use for a manager or legal reviewer who signs off but doesn't sign.
- Viewer — receives a copy but can't interact with it. Their viewing is tracked in the audit trail. Use for stakeholders who just need visibility.
Step 2: Set the signing order
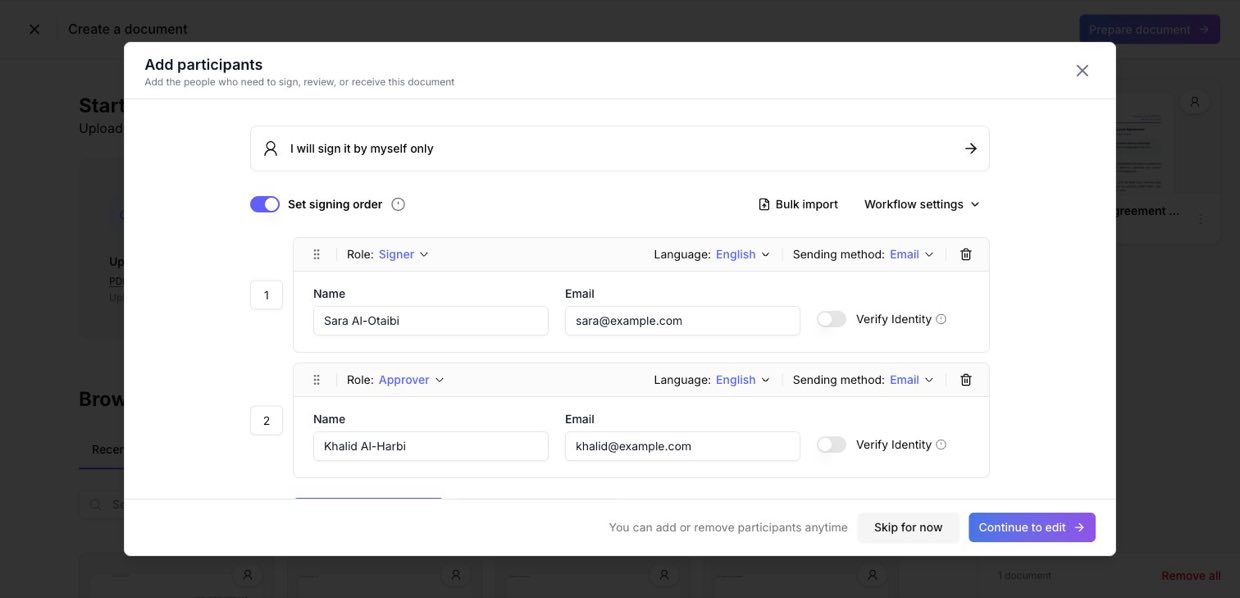
Step 2 of 4Turn on Set signing order to control the sequence. This is the difference between a sequential and a parallel workflow:
- Off (parallel) — everyone is notified at once and can act independently, in any order. Best for group sign-offs with no hierarchy.
- On (sequential) — each participant acts in turn; the next person is notified only once the previous one is done. Best for approval chains, like manager then director.
When it's on, each participant gets a number — drag the handles to reorder them.
Step 3: Place fields and pick the type
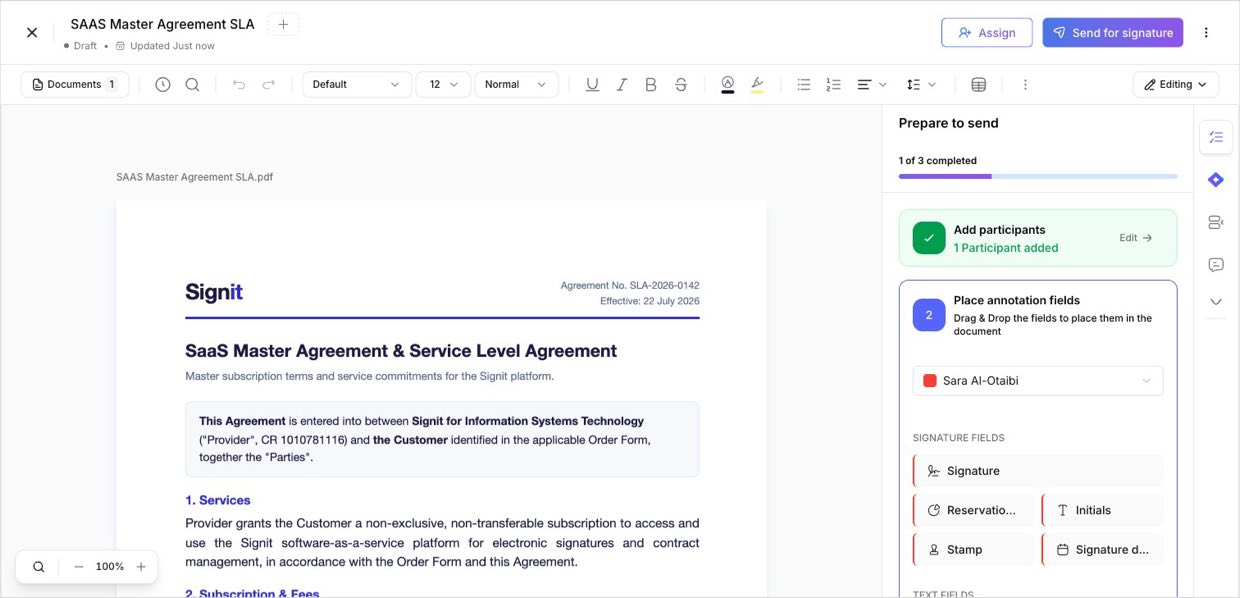
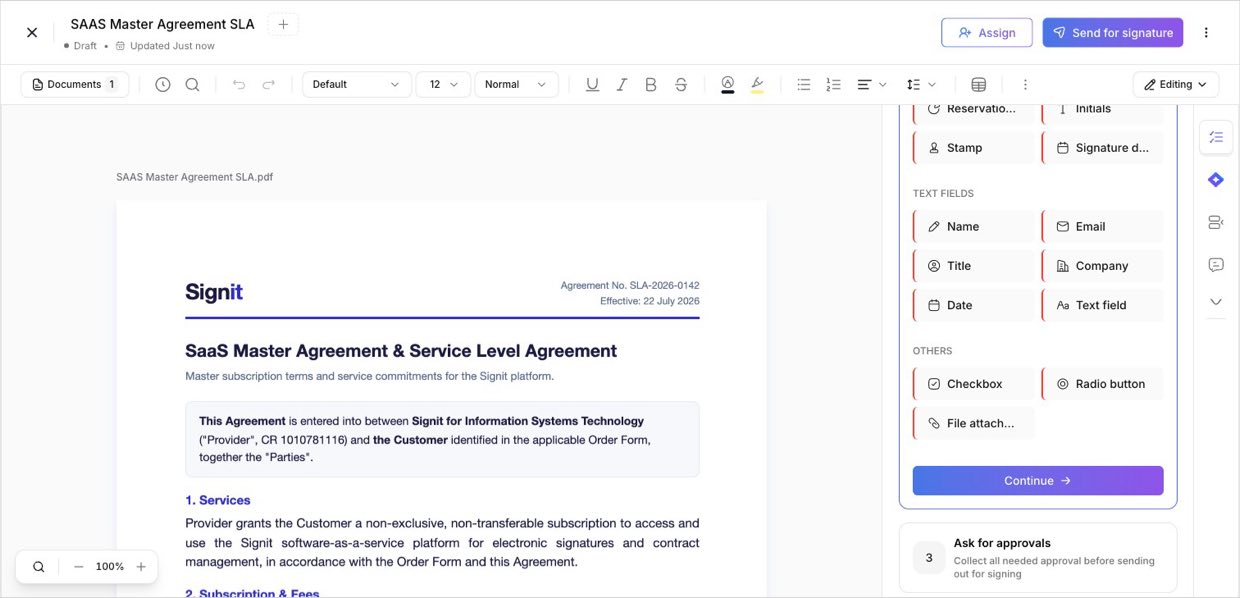
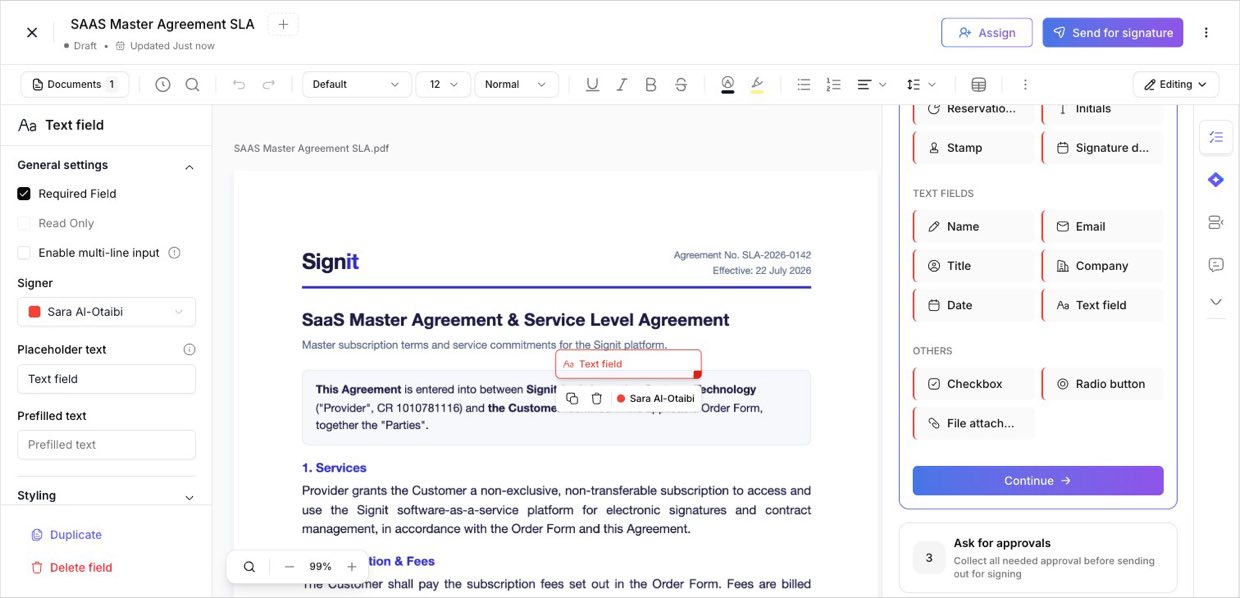
Step 3 of 4In the Prepare to send panel, open Place annotation fields and drag fields onto the document. Signit groups them into three families:
- Signature fields — Signature, Initials, Stamp, Signature date, and Reservation signing.
- Text fields — Name, Email, Title, Company, Date, and a free Text field. The signer-info ones (name, email, title, company) auto-capture that person's details.
- Others — Checkbox (yes/no or accept-terms), Radio button (pick one of several), and File attachment (let a signer upload an ID or proof).
Step 4: Assign each field and make it required
Step 4 of 4Every field belongs to one participant. Use the participant picker at the top of the fields panel (or the Signer dropdown in a field's properties) so each person only sees and fills their own fields — each participant gets their own color.
Select a placed field to open its properties. Tick Required Field so it must be completed before the document can be submitted — leave it unchecked to make it optional. You can also set placeholder text, prefilled text, or make it read-only.
Good to know
Required fields block submission until they're filled — a safe way to make sure nothing critical is missed.
You can add or remove participants at any time before sending; fields assigned to a removed participant need reassigning.
Fields are color-coded by participant, so it's easy to see at a glance who fills what.
Need help?
Stuck on roles, order, or fields? The Signit support team can walk you through it.
Signit support team
Reach out for help — or contact your dedicated account manager for urgent issues.
Was this article helpful?