Why use templates?
A template is a reusable document with its roles and fields already set up. Instead of rebuilding the same NDA, employment contract, or leave request every time — re-uploading the file, re-typing the recipients, re-placing every signature box — you build it once and reuse it. Templates save time, keep documents consistent, and remove the manual setup that's easiest to get wrong under pressure.
If you used Workflow templates before, this is the same idea in a new place: templates now live in the left sidebar, roles and fields are set in one flow, and each role can carry a default name and email.
1. The templates dashboard
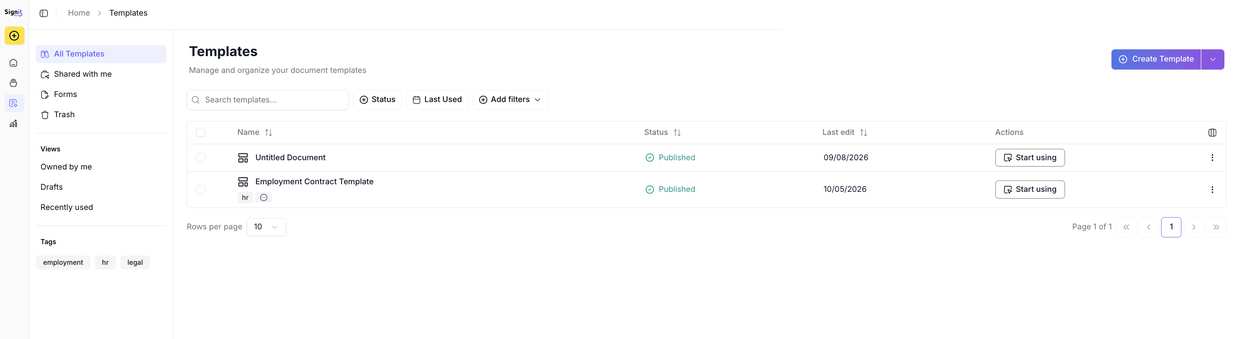
TemplatesOpen Templates from the left sidebar — every template you own or can access is listed here. Switch between All templates, Shared with me, Forms, and Trash; filter by owner, drafts, recently used, or tag; and use Start using on any published template to begin a request from it. To build a new one, click Create template in the top right.
2. Two ways to build
Pick your routeThe create-template screen gives you two routes to the same result — both end at the same Review & finish dialog:
- Path A — start from a document. Upload a file (or start blank / pick a template), then place fields on it. Use this when you already have the document. Button: Prepare template.
- Path B — start from the roles. Define the participants first and attach the document later. Button: Skip & add roles.
The steps below follow Path A; Path B is identical except it skips straight to the review screen (see “Good practice”).
3. Define the roles
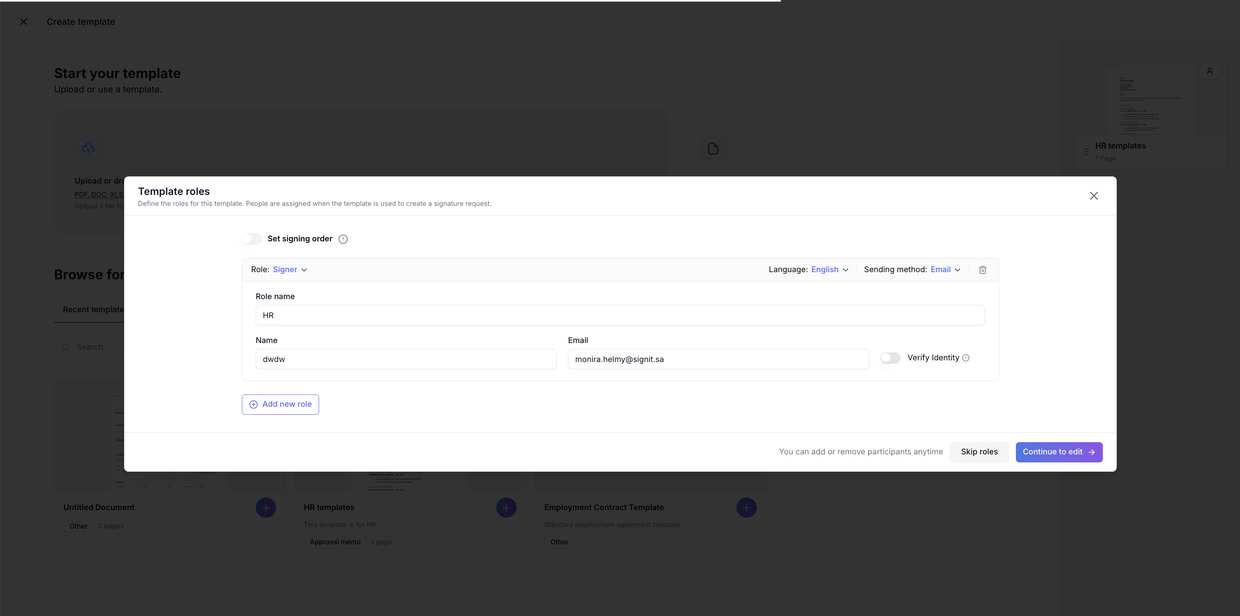
Roles, not peopleThe Template roles dialog opens. A role is a placeholder for whoever will act on the document — Employee, Manager, CEO — you're describing the position, not the person.
- Give each role a clear Role name, and set its type from the Role dropdown (Signer, and the other participant types).
- Optionally add a default Name and Email — saved into the template and pre-filled every time it's used.
- Adjust Language and Sending method, turn on Verify identity if needed, and Set signing order if participants must act one after another.
- Add a role for each participant, then click Continue to edit.
4. Place the annotation fields
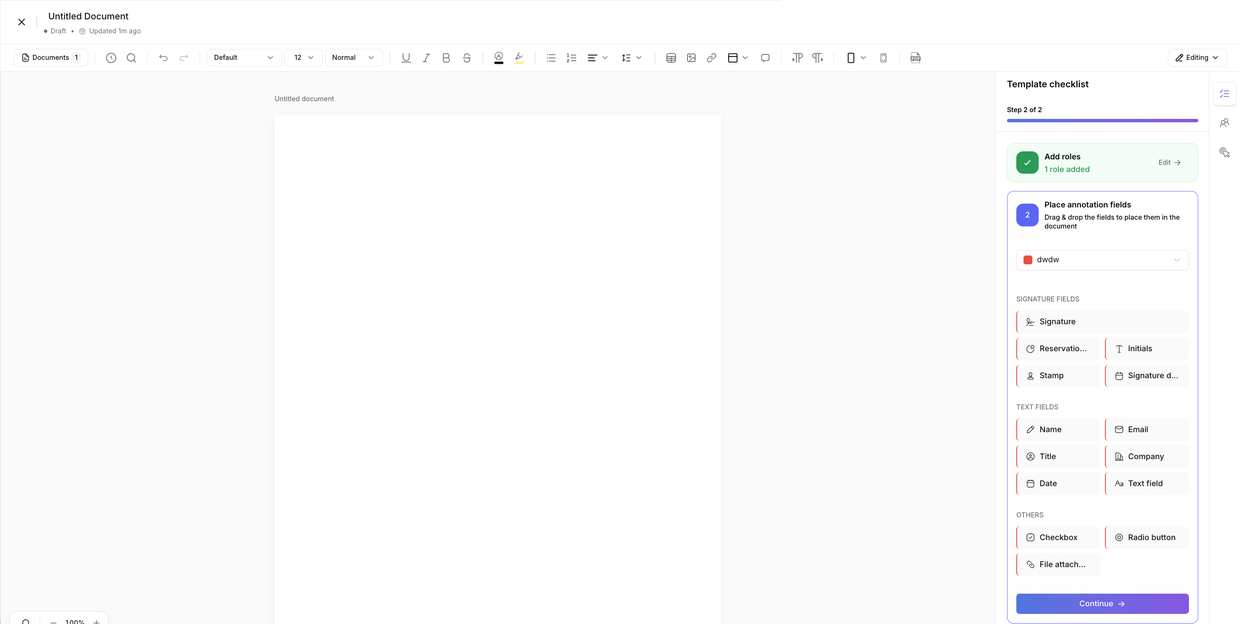
Assign to rolesThe document opens in the editor. Pick the role you're placing fields for from the dropdown at the top of the panel — each role has its own colour — then drag fields onto the document. Switch roles and place theirs, then click Continue → Review & finish.
- Always check which role is selected before you drag a field. Fields belong to the role that was active when you placed them, so a signature dropped under the wrong role waits for the wrong person.
5. Review and finish
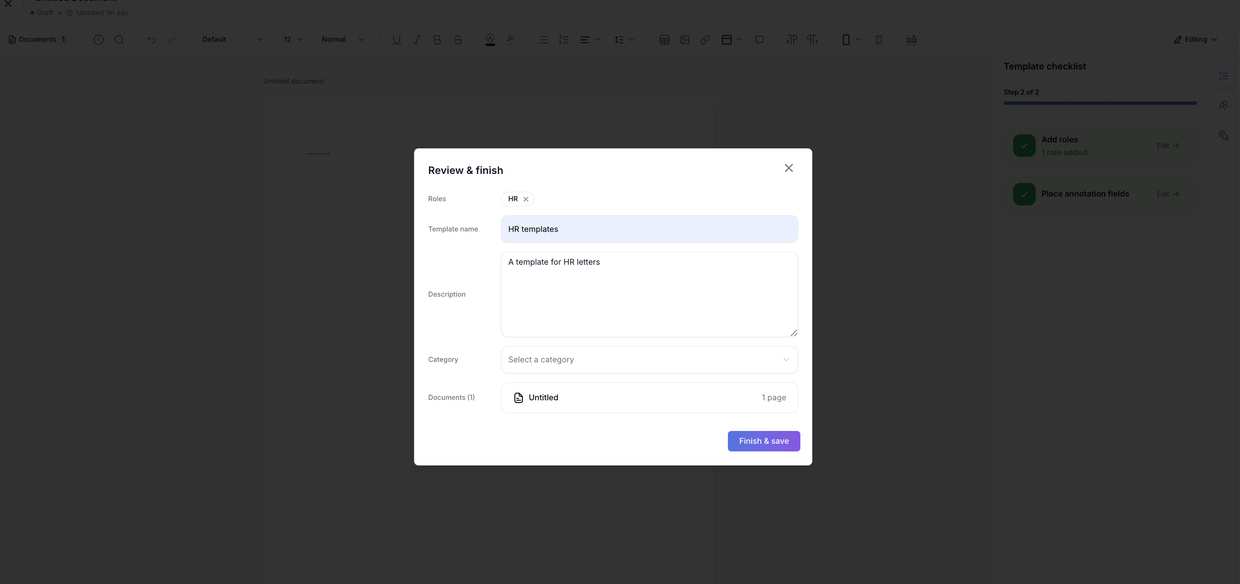
Make it findableThe Review & finish dialog collects the details that make the template easy to find later. Check the Roles chips, enter a Template name (describe the document, not the project — “Standard NDA”, not “NDA v3 final”), add a short Description, and pick a Category. Confirm the documents listed, then click Finish & save — the template is published and ready to use.
Good practice
Assign fields to roles, never to specific people — that's what makes a template reusable. A field on the Employee role follows whoever is assigned it next month; a field tied to an email does not.
Only add a default name and email when the same person genuinely fills that role every time (an internal HR signer). For roles that change each document, leave them blank.
Path B saves a template with no fields yet — open it from the dashboard and place the fields before anyone relies on it.
Fields group in the editor into Signature (Signature, Reservation, Initials, Stamp, Signature date), Text (Name, Email, Title, Company, Date, Text field), and Others (Checkbox, Radio button, File attachment).
Need help?
If you get stuck at any step, contact the Signit support team.
Signit support team
Reach out for help — or contact your dedicated account manager for urgent issues.
Was this article helpful?