Before you start
This guide picks up once you've built an approval workflow. Here you'll attach one to a real document and run it end to end — so the right people approve before it goes out for signature. We'll use a simple one-step workflow to show the idea; the same four steps apply to longer, multi-stage flows. (Haven't built a workflow yet? Start with Set up an approval workflow.)
Step 1: Attach the workflow to your document
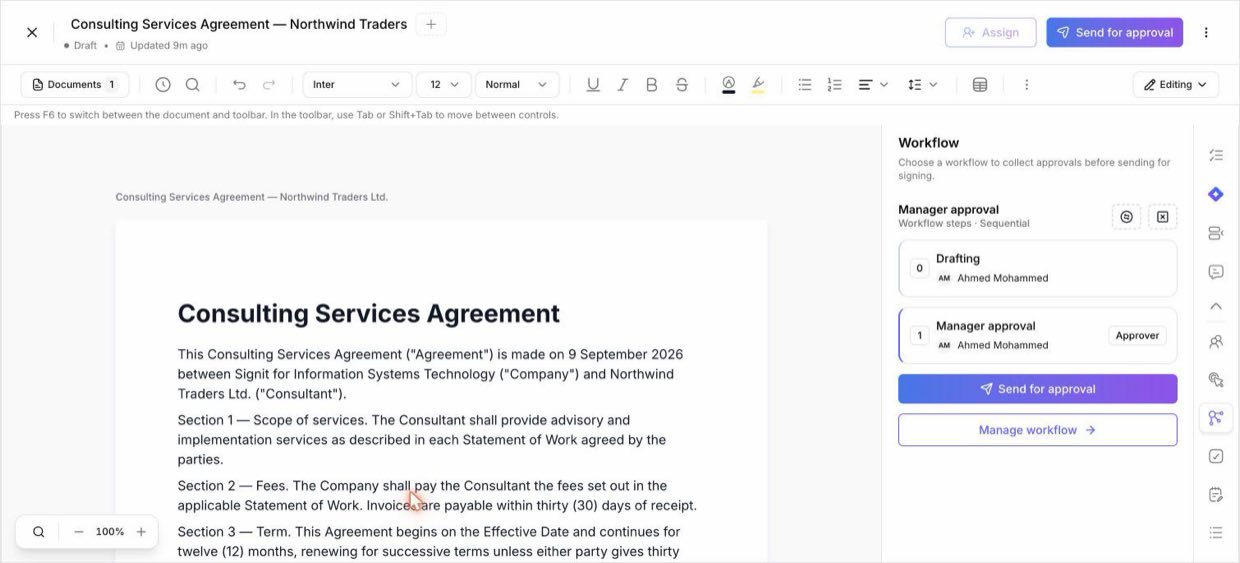
Step 1 of 4Open your document in the editor and open the Workflow panel (the approval-flow icon in the right rail). Pick a workflow from Most used workflows and click Use — or choose Select a workflow to browse them all. Its steps attach to the document; here, a single Manager approval step.
Step 2: Send it for approval
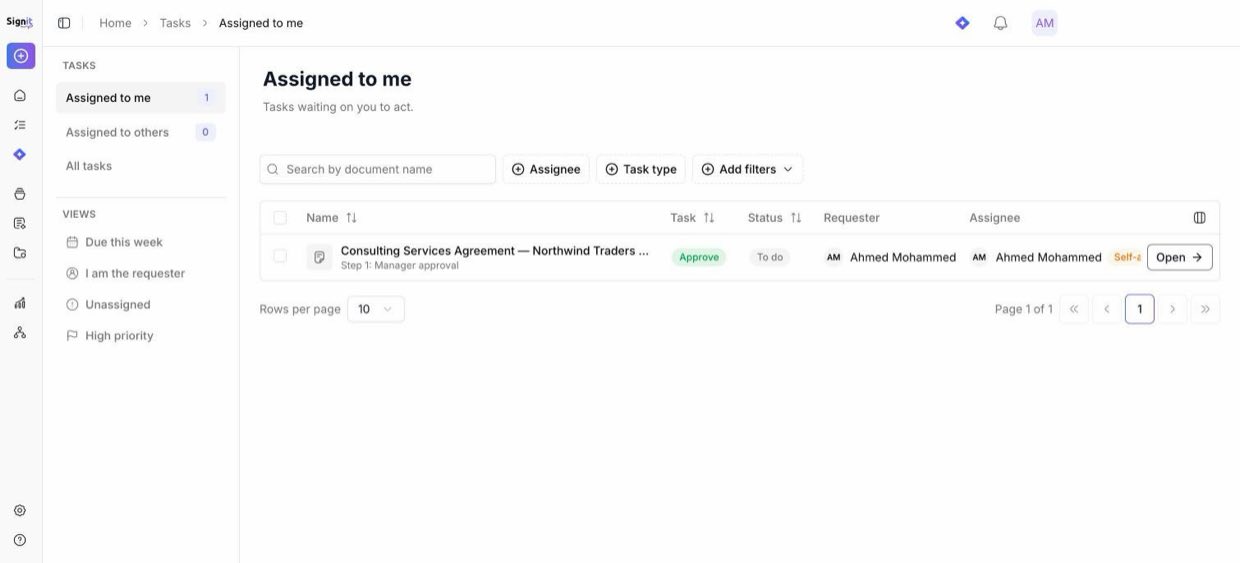
Step 2 of 4Click Send for approval. The document moves to Approval status and each approver is notified. They'll find it under Tasks → Assigned to me, waiting on their action.
Step 3: The approver reviews and approves
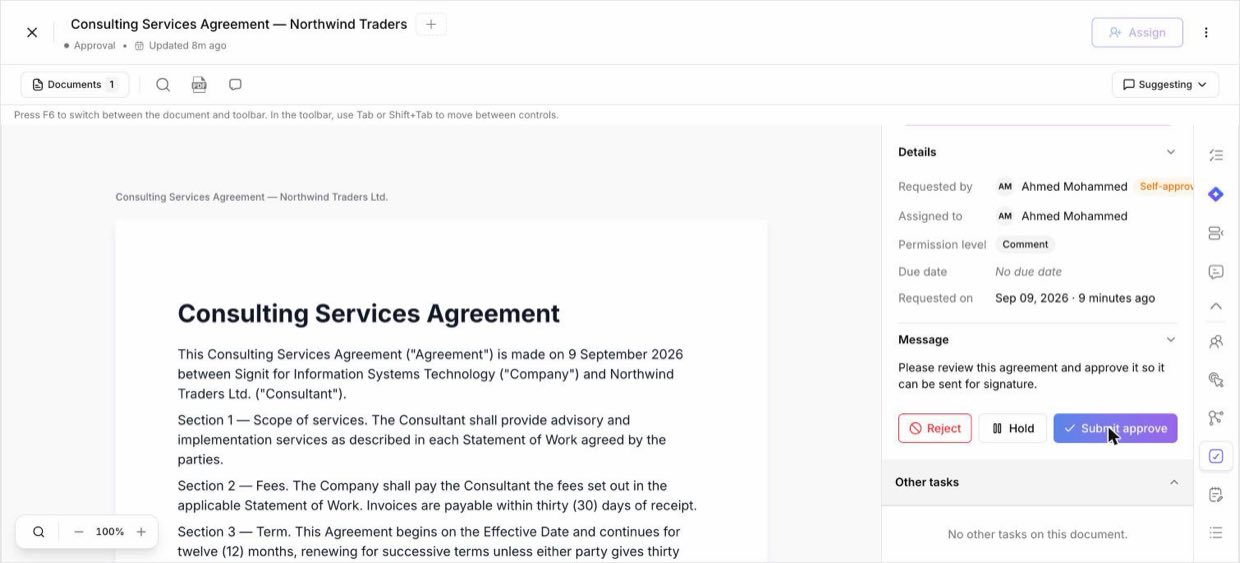
Step 3 of 4The approver opens the task, reads the step's message, and clicks Start, then Submit approve — with an optional note. They can also Reject the document or put it on Hold. (If you're the approver on a step you requested yourself, Signit records it as a self-approval in the audit trail.)
Step 4: Track progress and finish
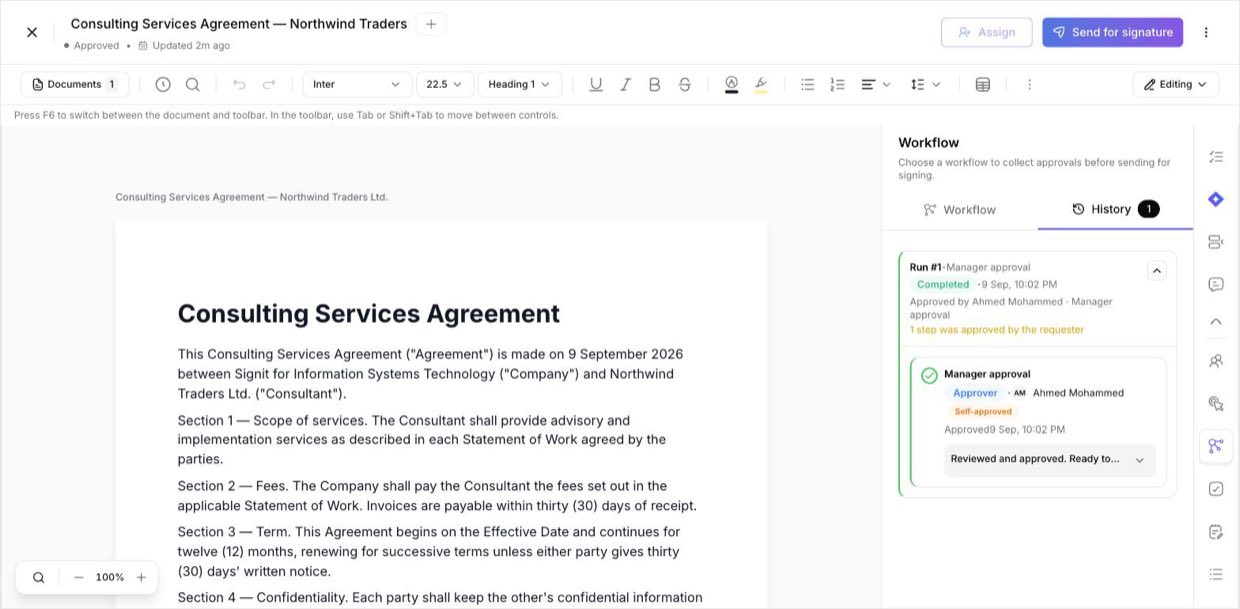
Step 4 of 4Follow the run in the Workflow panel's History tab — every step shows who approved and when. Once the last approval is in, the workflow is complete and the document is ready: click Send for signature to send it. Want it to go out on its own instead? Turn on Auto-send for signing when you build the workflow, and Signit sends it to signers the moment approvals finish — no extra click.
Good to know
Multi-step, in order: a workflow can chain several sequential steps (say Manager, then Legal) — the next approver is notified only after the previous step is approved.
Auto-send: turn it on and an approved document goes straight to signers; turn it off (as here) to review and send it yourself.
Permission levels: each step can be View, Comment, Suggest, or Edit — so an approver can just sign off, or make changes first.
Reuse it on a template, so every document made from that template routes for approval the same way.
Need help?
If you get stuck at any step, contact the Signit support team.
Signit support team
Reach out for help — or contact your dedicated account manager for urgent issues.
Was this article helpful?